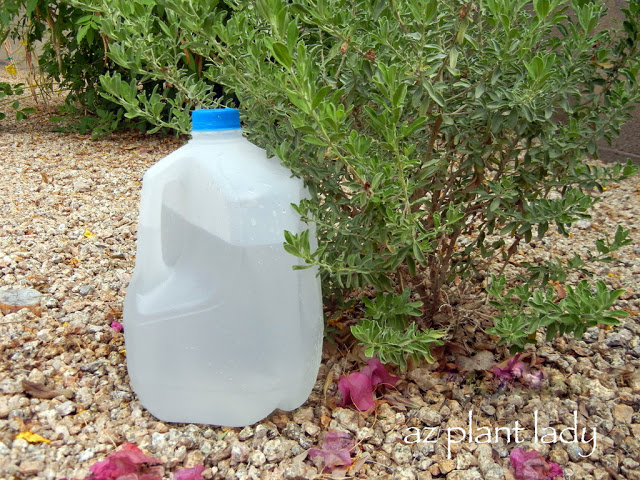
Portable Drip Irrigation With a Recycled Milk Jug

Do you have plants that need extra water this summer? I have the portable drip irrigation solution for you!

Many of us have a few plants that aren’t connected to an irrigation system. Some people don’t have an irrigation system and use a hose to water plants, which is time-consuming and inefficient.

Portable Drip Irrigation is an Alternative to Traditional Irrigation

While you can certainly haul out your hose and water each of your thirsty plants, it is not the best way. The main problem is the hose puts out water quickly and the soil can’t absorb it fast enough. As a result, much of the water runs off and doesn’t benefit the plant as much as it should.

So, if the time-consuming task of watering plants by hand isn’t your cup of tea, I’m here for you. You can make life easier by creating your own portable drip irrigation system with a recycled milk jug.

3 Steps to Create a Simple Recycled Drip Irrigation System

This solution is very easy and will have you digging through your recycle bin collecting your used milk jugs.

To get started, you will need an empty plastic milk jug and a nail.

1. Make the Holes:

Heat the nail using a lighter or stove burner. Then use the nail to pierce 3 – 4 small holes in the bottom of the milk jug.
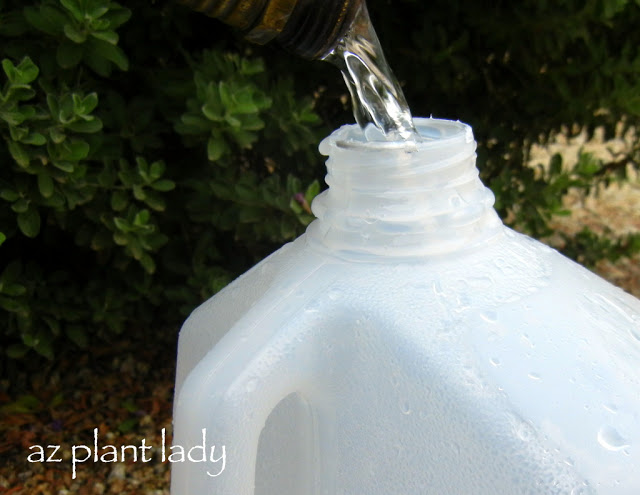
Pouring water in a jug for portable drip irrigation

2. Fill the Jug with Water:

Fill the milk jug up with water, put the cap on and carry it upside down to the plant. Turn it right side up and set it down to the plant that needs irrigation. *You can also set the empty milk jug(s) next to your plants, bring the hose to them and fill with water that way.
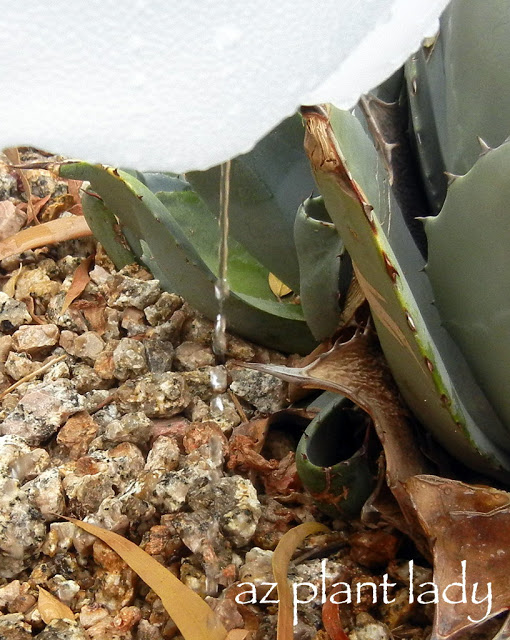
Portable Drip Irrigation at the bottom of a  Recycled Milk Jug

3. Portable Drip Irrigation Water Pressure

Slightly loosen the cap, which will allow the water to drip out of the holes at the bottom – this allows the water to penetrate the soil slowly, instead of running off.

Once the water has drained out of the bottom of the jug, pick up your milk jug and move it to the next plant. After you are done, bring the empty jugs inside and store until the next time you need them.

Special Note: If you live in a windy area and worry the milk jug will blow away, weigh them down with an inch of small rocks in the bottom of the jug – the rocks won’t interfere with the water dripping out.
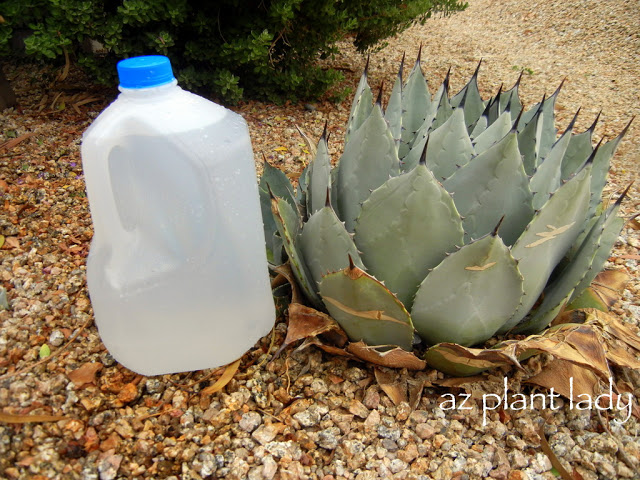
Milk jug next to an agave plant

I usually recommend this method of irrigating cacti monthly in summer.

This portable drip irrigation system is a great aid for those who live in areas that are suffering from drought or where an irrigation system may not exist.

**A semi-permanent variation of this method is to create holes along the sides instead of on the bottom. Then bury the entire jug next to the plant, leaving just the top exposed. To water plants, remove the milk cap and fill with water and replace the cap.

I hope you find this DIY garden project helpful. Please feel free to share it with your friends by clicking the “Share” button below. 

How To Grow Tomatoes in the Desert

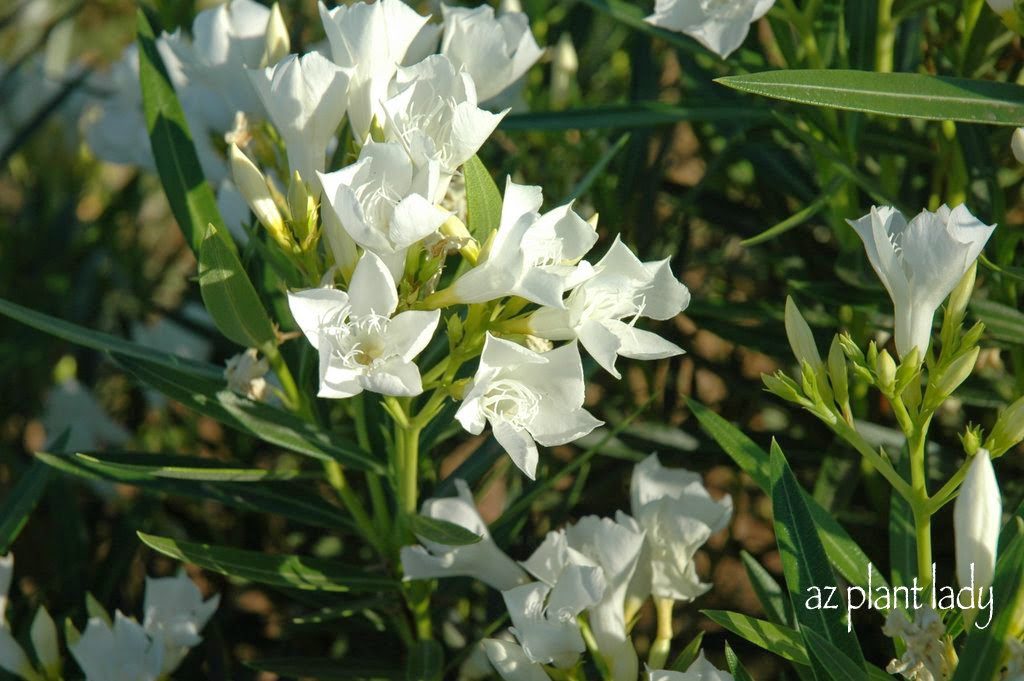
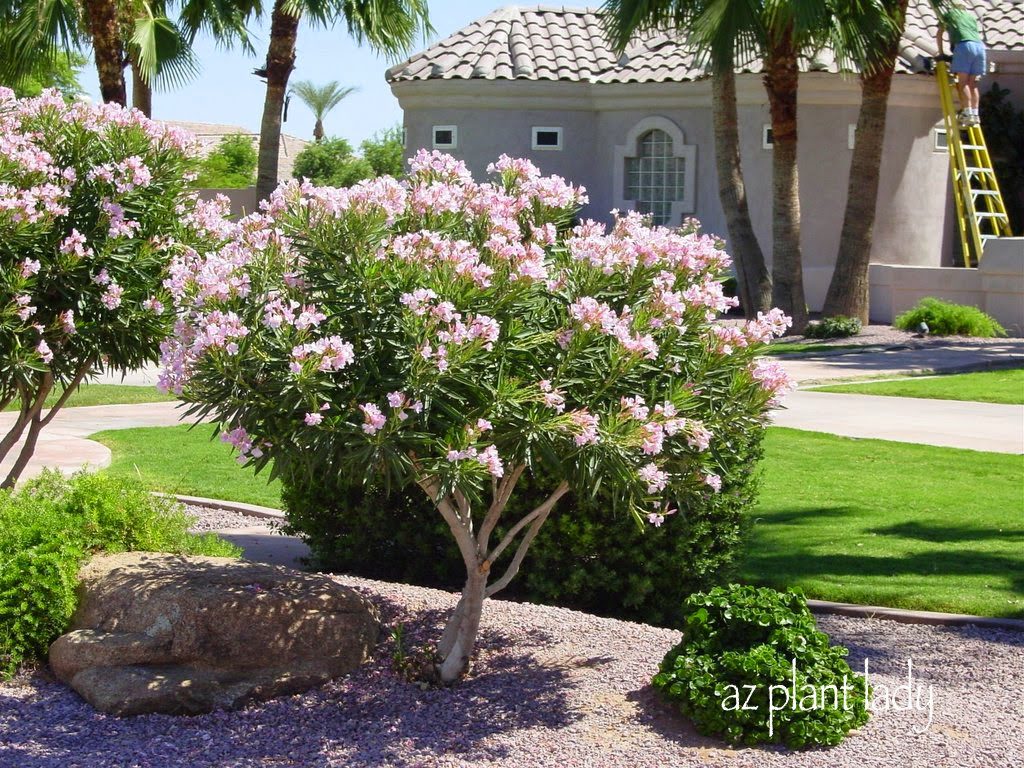
Love them or hate them, oleanders have a firm foothold in the desert landscape where they are usually seen creating living green ‘walls’ in order to provide privacy.

Plant Disease: Oleander Leaf Scorch

Their popularity is due in large part to several characteristics:

– Their evergreen foliage provides the rich, dark green color that many miss living in the desert.

– Oleanders are easy to grow, with little to no fertilizer and are drought tolerant once established.

– They add beauty to the landscape spring through fall with their flowers.  

Plant Disease: Oleander Leaf Scorch

While oleanders’ popularity is still holding on, a fatal disease that affects them has spread from California and is now being seen increasingly in Arizona.

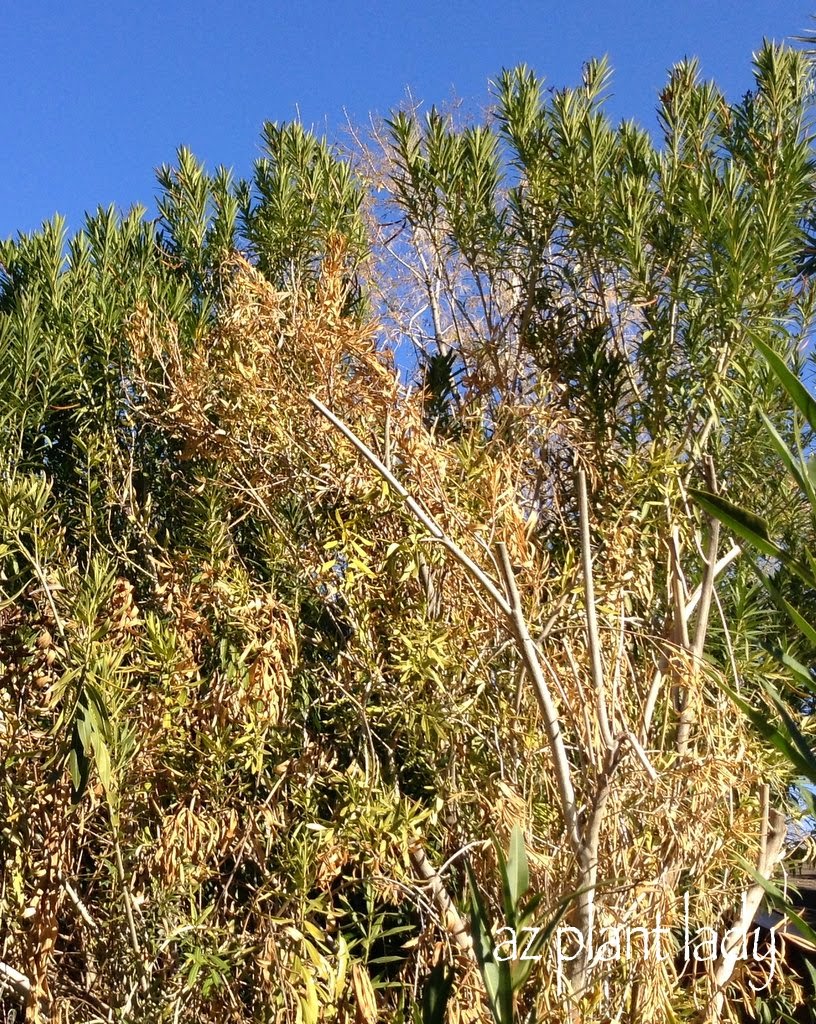
Oleander leaf scorch (Xylella fastidiosa) is a bacterial disease that plugs up the vascular system of affected oleanders, eventually making the movement of water throughout the plant impossible.

This disease is spread by flying insects called sharpshooters. These small insects (1/4 inch long) become carriers of the disease when they feed upon an infected oleander. Thereafter, they spread it to every other oleander they feed upon.

Oleanders in Southern California were first diagnosed with the disease in the early 90s, and it was just a matter of time before it spread to Arizona.  

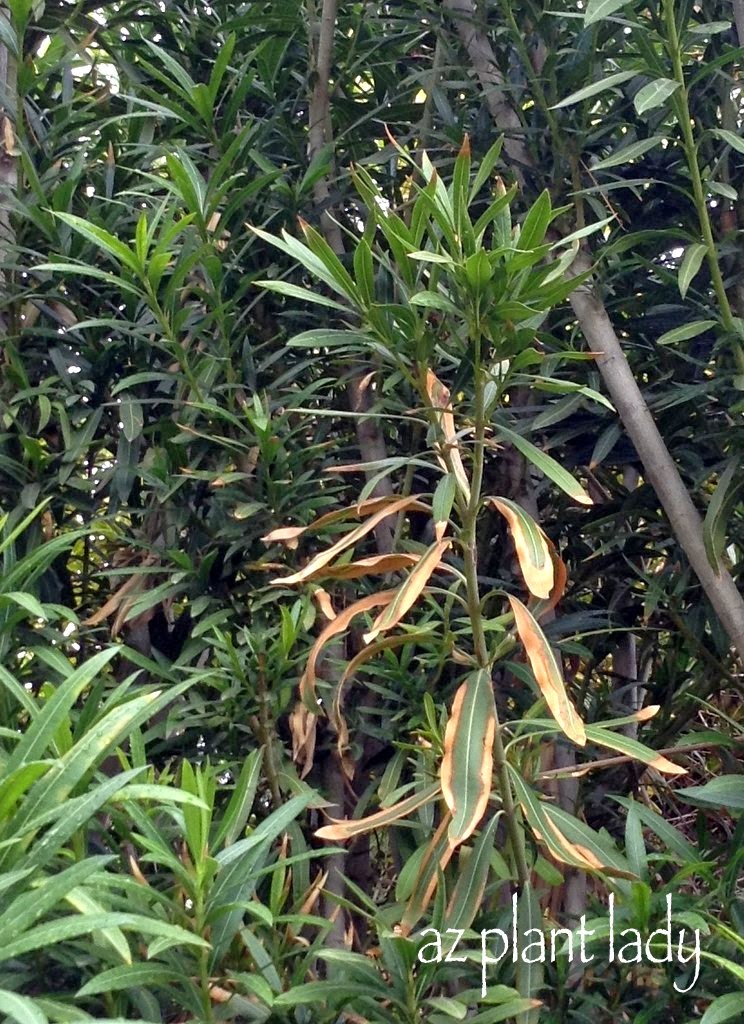
Advanced stages of oleander leaf scorch

Advanced stages of oleander leaf scorch

Oleander leaf scorch was first diagnosed in Arizona in 2004. Its spread has been slow but inexorable.

I have seen several cases of this disease during landscape consultations, including one that I did yesterday.

Plant Disease: Oleander Leaf Scorch

The homeowner had a very large, over 20-year-old oleander hedge that provided privacy from his neighbors.

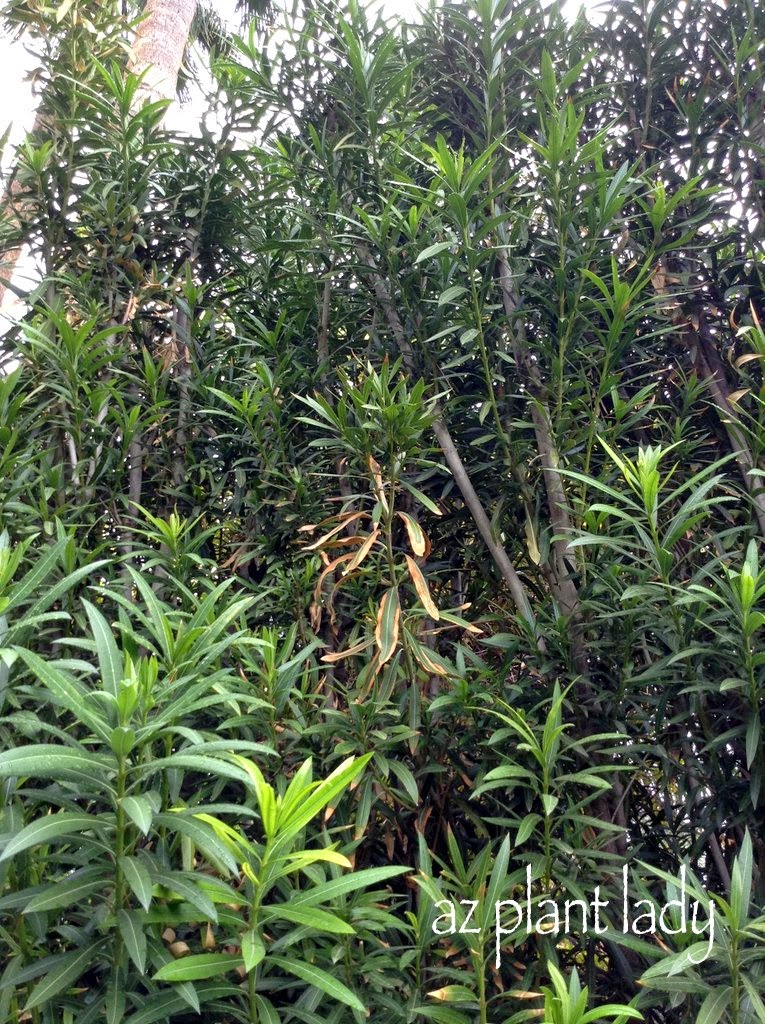
What may look like some browing leaves in this small branch is one of the classic symptoms of oleander leaf scorch.

Oleander leaf scorch

Oleander leaf scorch

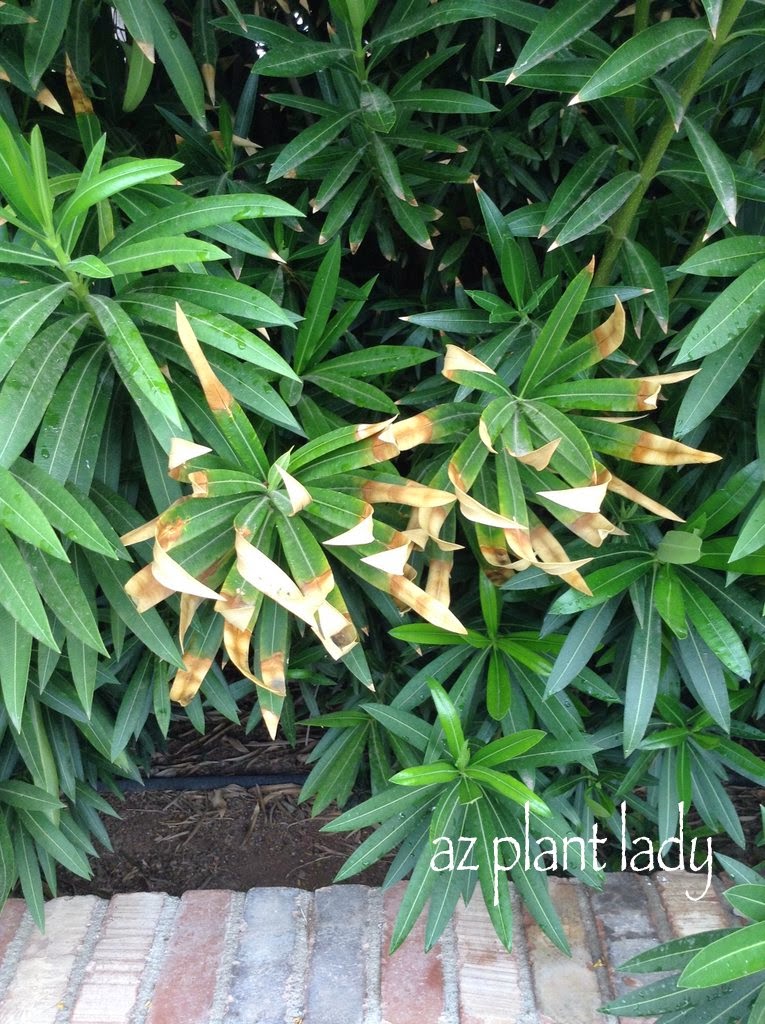
Close up, you can see the brown outer leaf margins, which are characteristic of oleander leaf scorch. (This is not to be confused with drought symptoms, which cause discoloration of the middle of the leaf.)

As we continued to walk along the row of oleanders, the infected oleanders were interspersed between healthy ones. The reason for this is that the nature of flying insects is that they hop from one plant to another, but not necessarily the next plant – they may fly 3 shrubs away before feeding again or to the next yard or block.  

Symptoms of oleander leaf scorch

Symptoms of oleander leaf scorch

This oleander showed another type of browning symptom of oleander leaf scorch with the tips looking ‘scorched’.

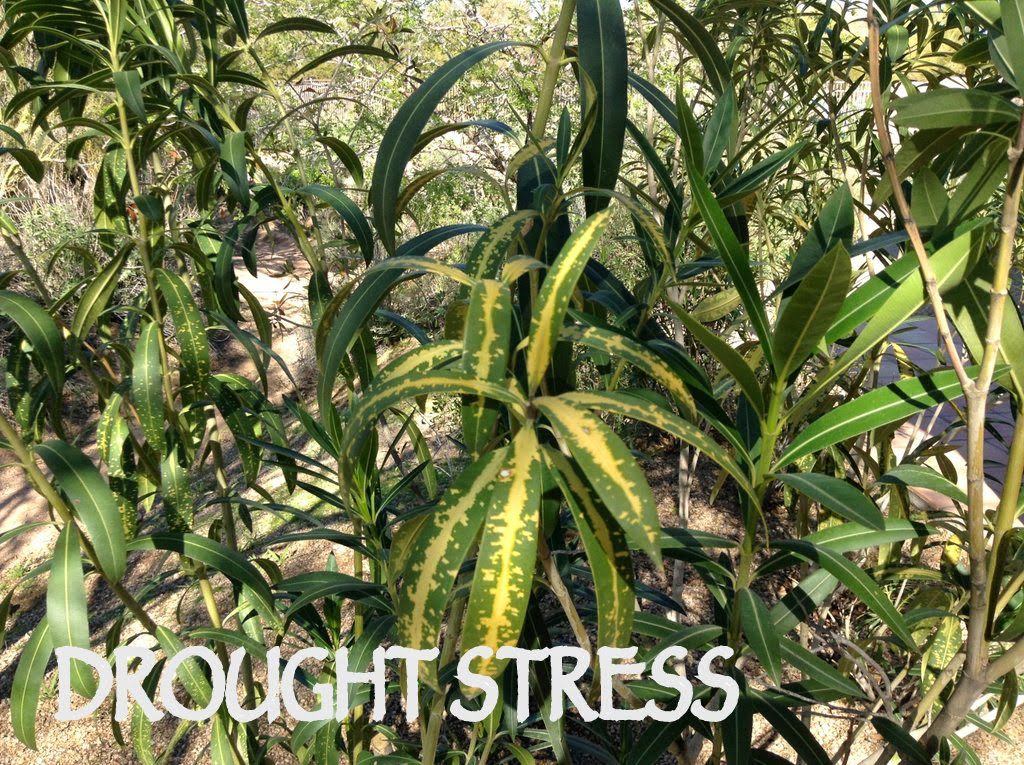
It’s important to note that salt burn resulting from drought or shallow irrigation can cause similar symptoms as shown in the photo below:

Drought-stressed oleander leaves

Drought-stressed oleander leaves

Note the middle of the oleander leaf is affected in the case of drought stress. While unsightly, the oleander pictured above, does NOT show signs of oleander leaf scorch.

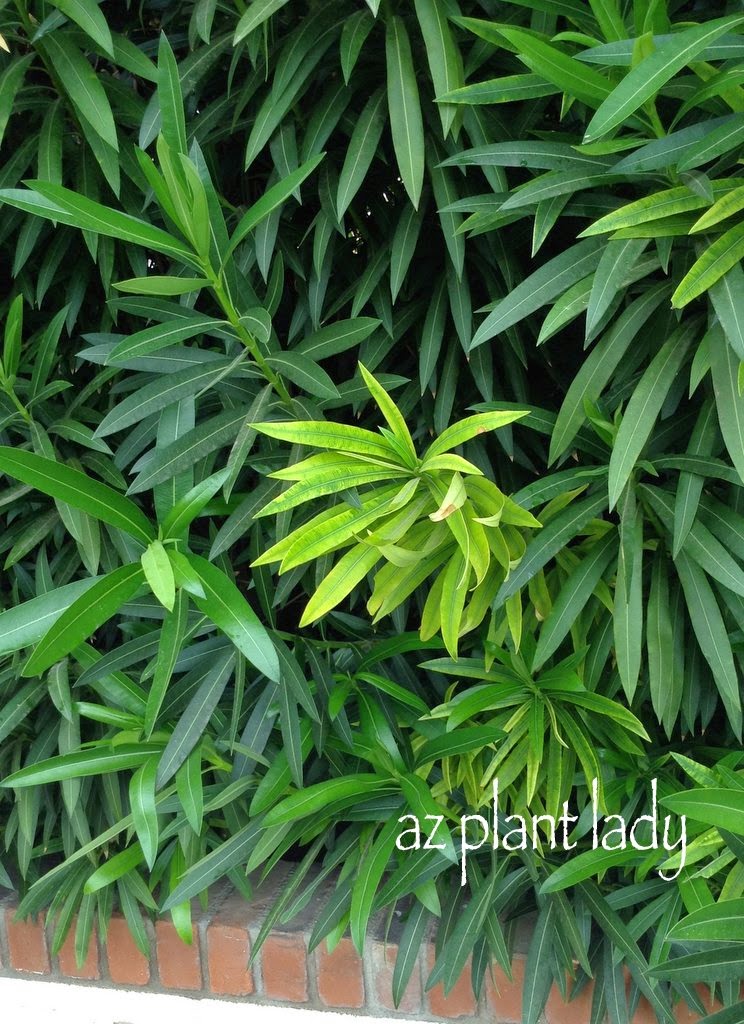
Initial signs of oleander leaf scorch.

Initial signs of oleander leaf scorch.

Back to the oleanders showing signs of oleander leaf scorch – I could see the beginning of symptoms with lighter green alongside darker leaves by looking closely at seemingly healthy oleanders. The signs of the disease don’t show up all at once in the beginning. Often, it starts out with a branch here and there showing signs initially that will gradually progress throughout the entire plant.

It’s important to note that once an oleander has been infected with this disease, the entire plant has it – not just the branches that initially show the first signs.  

Lower leaves showing the beginning symptoms of oleander leaf scorch.

Lower leaves showing the beginning symptoms of oleander leaf scorch.

So, what is the treatment for oleander leaf scorch? Sadly, there is no cure, and once infected, it will eventually kill oleanders over a 3 – 5 year period.

Some experts recommend pruning out affected branches to improve the appearance of infected oleander shrubs for the short term. But they will die.

I recommend removing infected oleanders right away to help keep the disease from spreading.

Initial signs of oleander leaf scorch Plant Disease

Initial signs of oleander leaf scorch

Consult with an expert if you suspect that your oleanders are infected.  Problems with irrigation, nutrient deficiency, and salt burn can mimic some of the symptoms of oleander leaf scorch, and a horticulturist or other landscape expert can help you rule out other causes. Ultimately, positive identification of oleander leaf scorch can only be made by lab tests through your local cooperative extension office.

Can you simply get rid of infected oleanders and start over with new ones? The answer is “no.” The disease is already present in the local sharpshooter insect population, and it is only a matter of time before it infects your new oleander shrubs.

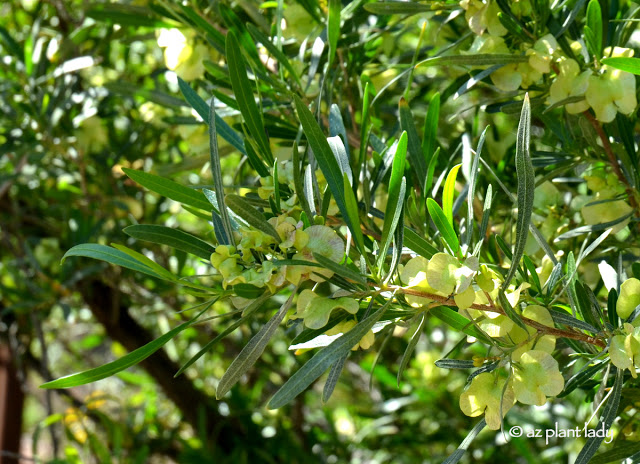
I recommend using Arizona rosewood (Vauquelinia californica) or hopbush (Dodonaea viscosa) as an alternative to oleanders. Both are evergreen, recommended for use near pools, make a great hedge, are drought tolerant, and attractive.

For more information on oleander leaf scorch, you may want to check out the following links:

Leaf Scorch Management Guidelines

Oleander Leaf Scorch

Oleander Leaf Scorch Strikes Again…

Cultivating Wildflowers: Nature’s Colorful Display

Rediscovering the Desert’s Beauty in Fall

As summer begins to slowly fade and the heat begins to dissipate, the Southwestern garden comes alive with second spring.

"Second Spring" in the Southwest Garden

In the absence of scorching 100+ degree temperatures, both plants and people reawaken to the vibrant beauty of the desert landscape during the fall season.

The Allure of Autumn is “Second Spring”

When people talk about their favorite season, many will tell you that spring is the time that they enjoy the most as their gardens come alive, spring forth with new green growth and colorful blooms. But in the desert Southwest, there’s another season that deserves just as much acclaim – fall, often referred to as the “second spring.”

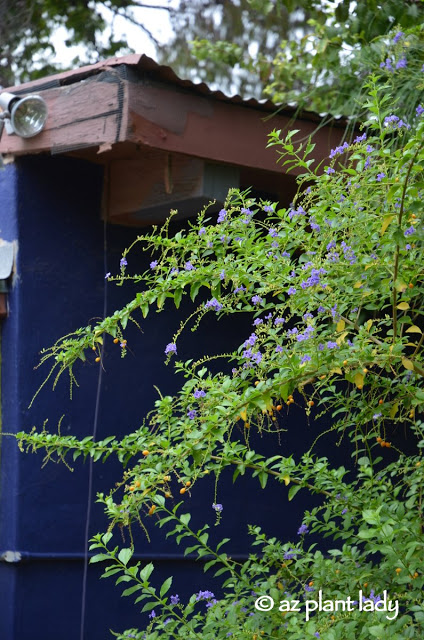
Sky Flower (Duranta erecta) during second spring

Sky Flower (Duranta erecta)

While spring is a glorious time in the desert landscape with winter blooms overlapping with spring flowering plants along with cactus flowers – it isn’t the only ‘spring’ that the desert experiences.

"second spring" garden beauty in the desert Southwest

A Season of Renewal

Fall in the desert brings a rejuvenating touch. The cooler temperatures breathe new life into plants, coaxing them into refreshed appearances and prolonging their flowering displays. Irrigation becomes less of a chore. Birds, butterflies, and various wildlife also make a prominent return during the daytime hours.

The Great Outdoors Beckons

With the arrival of fall, desert residents find themselves irresistibly drawn outdoors. Whether it’s leisurely walks, al fresco dining, or simply working outdoors, the comfortable temperatures and captivating landscapes make every moment spent outside a delight.

"second spring" pathway in the desert Southwest

Fall is the ideal season for making alterations to your garden. It’s the perfect time to replace thirsty, old plants with drought-tolerant alternatives or expand your outdoor living space by adding new features like patios or pergolas.

Flame Acanthus (Anisacanthus quadrifidus v. wrightii) during second spring

Flame Acanthus (Anisacanthus quadrifidus v. wrightii) 

Second Spring Planting for the Future

Regardless of your garden’s location, fall stands as the prime season for introducing new plants to your landscape. With three growing seasons ahead, it offers them the opportunity to establish robust root systems before the next scorching summer arrives.

No matter what garden region you live in – second spring is the best time of year to add new plants to the landscape as it provides plants with three seasons in which to grow a good root system before the heat of the next summer arrives.

**Thinking of making some changes to your landscape?  Click here for a list my favorite drought tolerant plants that provide fall blooms.  

A Colorful Yellow April Display: Palo Verde Trees

April in the desert garden is, in my humble opinion, the most beautiful time of year for summer blooms.  Winter and spring-flowering plants (Damianita, Penstemon, and ‘Valentine’ Emu Bush) are just beginning to fade and summer blooms are beginning to appear (Coral Fountain, Lantana, and Yellow Bells).   

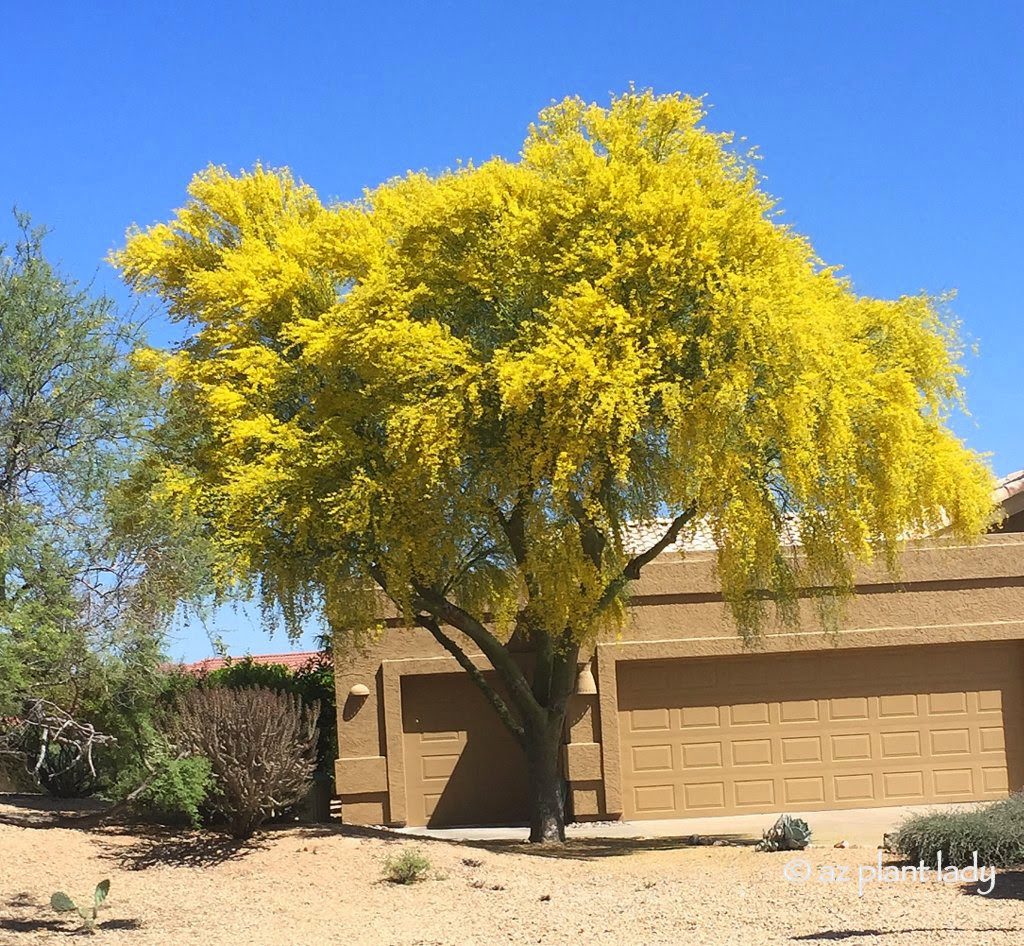
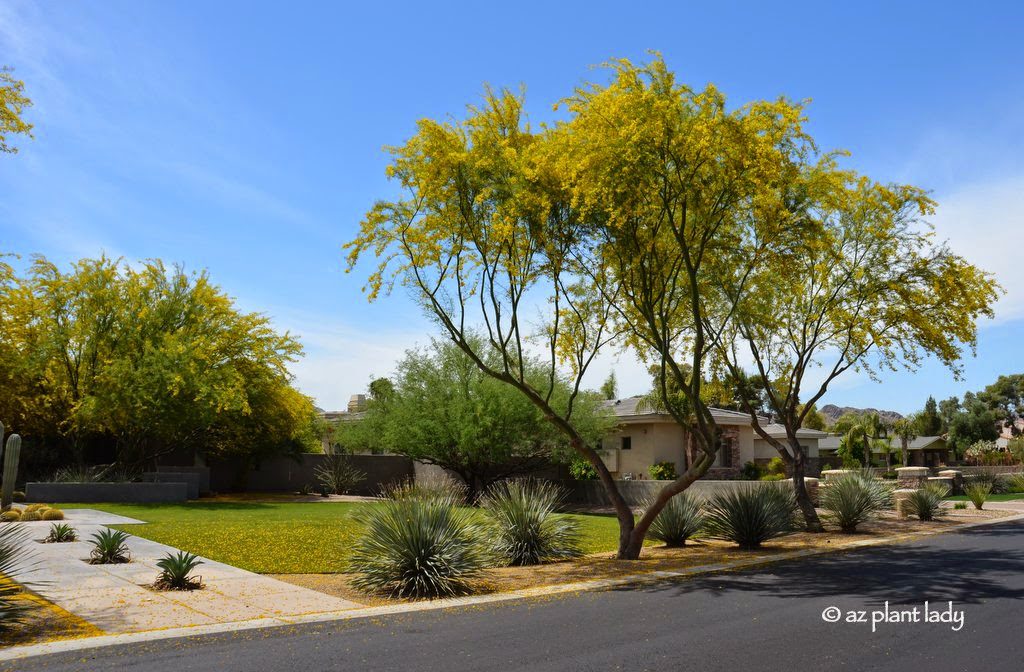
Clearly the most colorful event in April is the flowering of palo verde trees.  

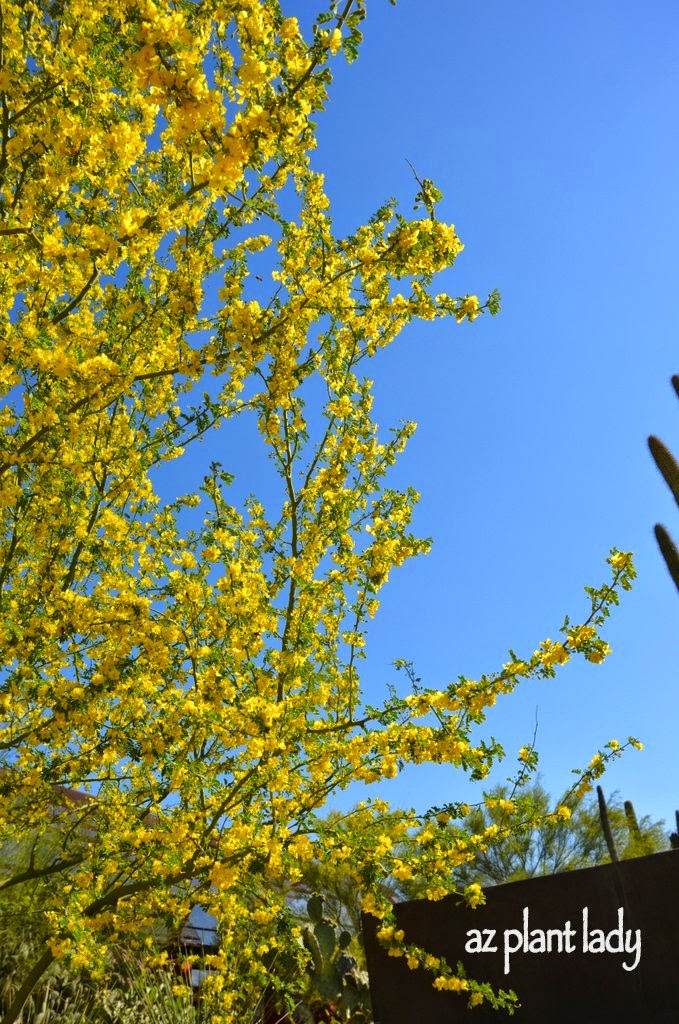
Did you know that each species of palo verde has a different shade of yellow?  

It’s true. The differences may not be obvious unless you see them next to each other. I’ll make it easier for you and show you some examples below.

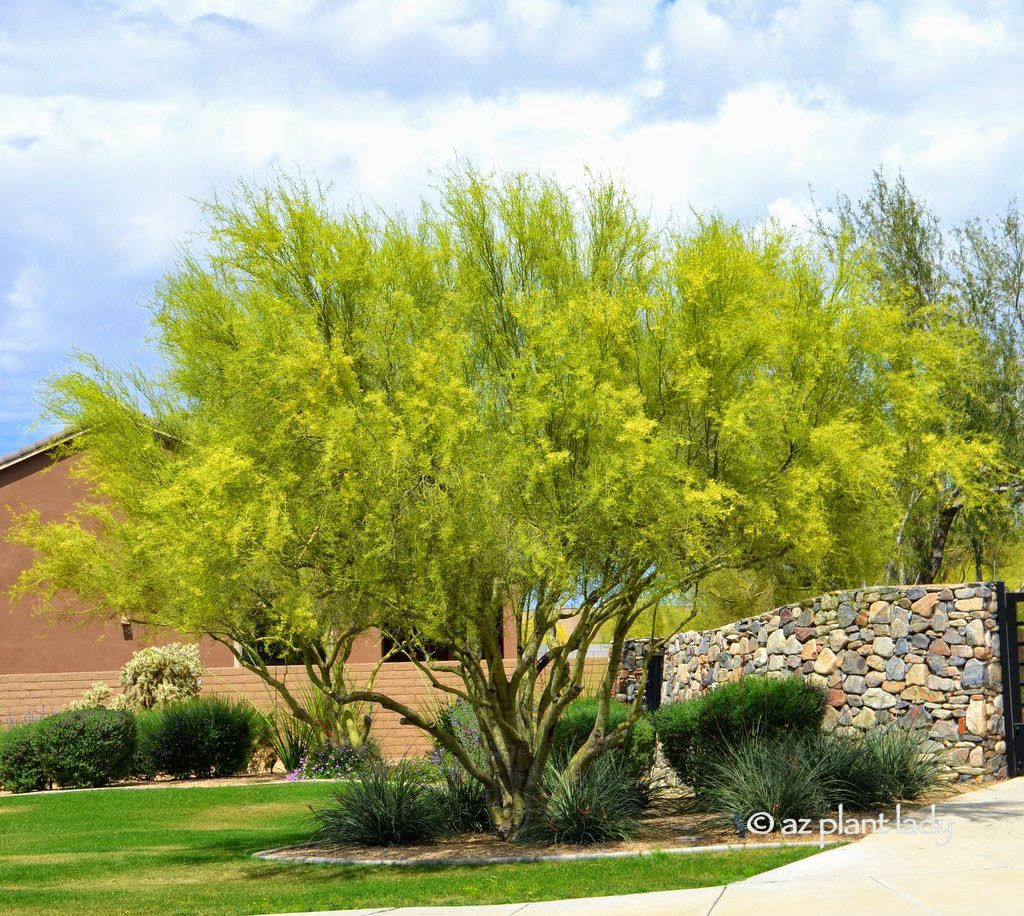
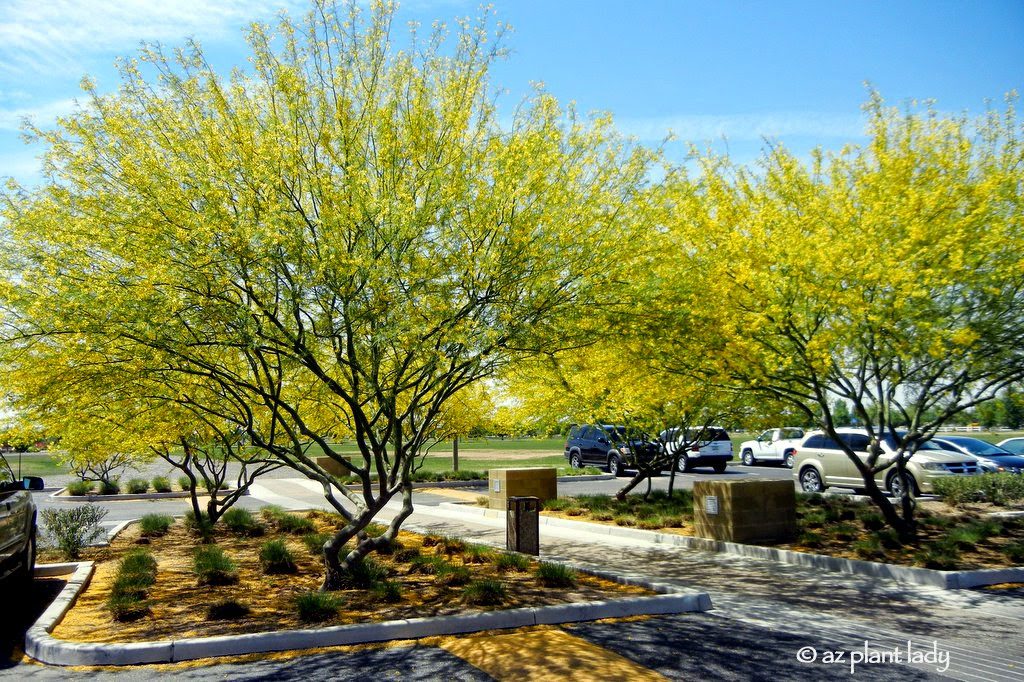
  • Blue Palo Verde (Parkinsonia florida)
  • Foothills (Littleaf) Palo Verde (Parkinsonia microphylla)
  • ‘Desert Museum’ Palo Verde (Parkinsonia hybrid ‘Desert Museum’)
  • Palo Brea (Parkinsonia praecox)
Blue Palo Verde (Parkinsonia florida)

Blue Palo Verde (Parkinsonia florida)

Foothills (Littleaf) Palo Verde (Parkinsonia microphylla)

Foothills (Littleaf) Palo Verde (Parkinsonia microphylla)

'Desert Museum' Palo Verde (Parkinsonia hybrid 'Desert Museum')

‘Desert Museum’ Palo Verde (Parkinsonia hybrid ‘Desert Museum’)

Palo Brea (Parkinsonia praecox)

Palo Brea (Parkinsonia praecox)

The arrival of these yellow flowers is met with delight by many and to the dismay of others. Those that like clean, pristine landscapes, without a stray leaf or fallen flower, don’t like the flowers that they leave behind.  

As for me, I like things mostly natural and the golden carpet that my ‘Desert Museum’ palo verde trees leave behind, is a welcome sight.  

A Contemporary Garden with Summer Blooms

.

summer blooms are beginning to appear

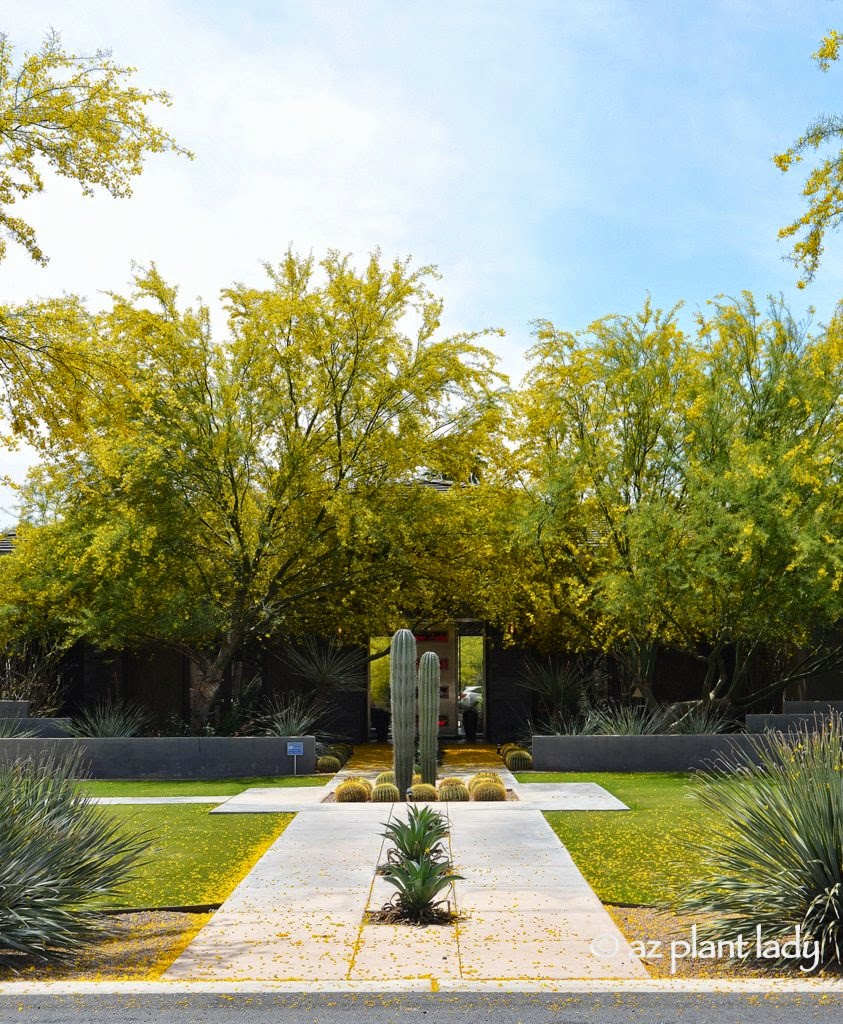
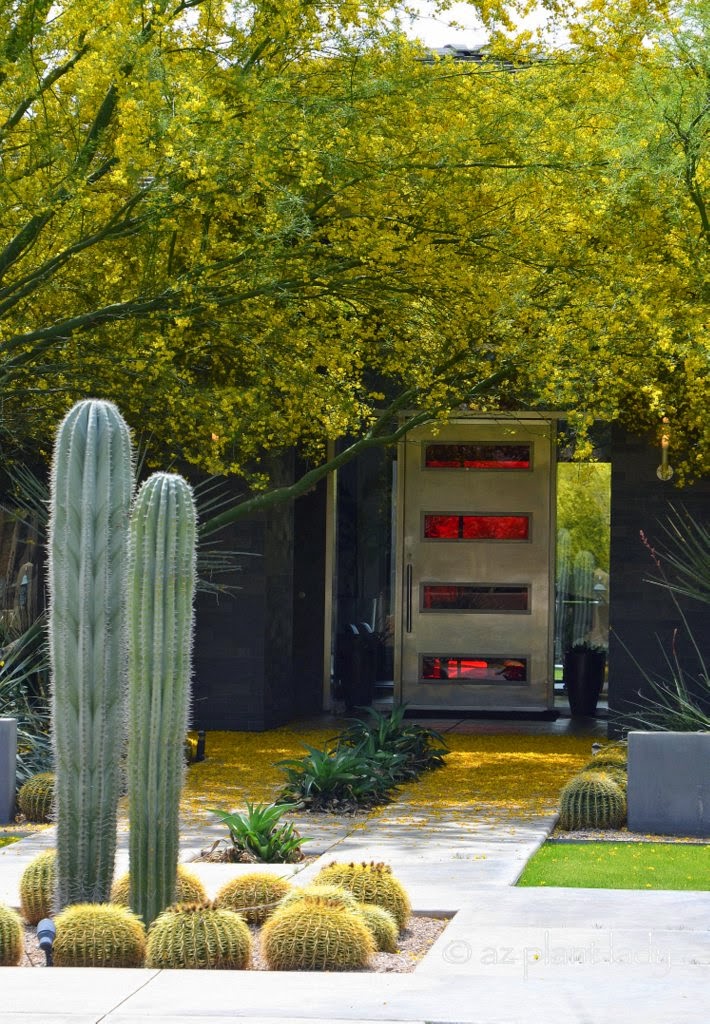
I like the contemporary entry to the above front garden flanked by desert spoon and the columnar cardon cacti (no, they aren’t saguaros) surrounded by golden barrels, it was the majestic ‘Desert Museum’ palo verde trees that caught my eye.

summer blooms are beginning to appear

Summer Blooms

Exploring the Garden’s Design

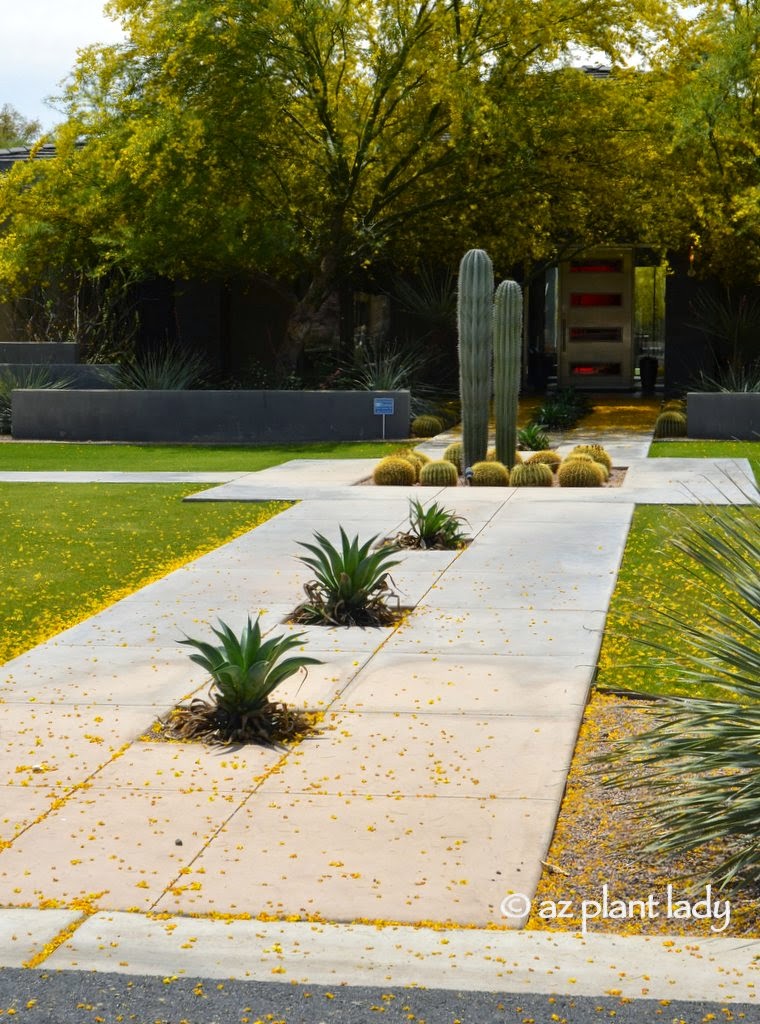
The plant palette is limited. This works well with contemporary design. The trees are pruned a bit too high. I like the flowers from the palo verde trees along the street decorating the grass and sidewalk.

summer blooms are beginning to appear

My personal style is more informal. I do appreciate contemporary design and really like this pathway. I believe a better species of agave that can handle full, reflected heat without growing too large would have been better – maybe Twin-Flower Agave (Agave geminiflora) or Artichoke Agave (Agave parrying var. truncata)?  

I’m in love with the flowers. Aren’t they fabulous?

Victoria agave

My favorite picture is one of the entryways. The ground is a solid carpet of golden yellow flowers. This contrasts beautifully with the gray-blue walls and red door.  

How about you?  Do you like the way flowers look on the ground?  Or do you feel the overwhelming impulse to blow them away?  

Introduction to a Passion

I have had a love affair with roses for over 26 years.

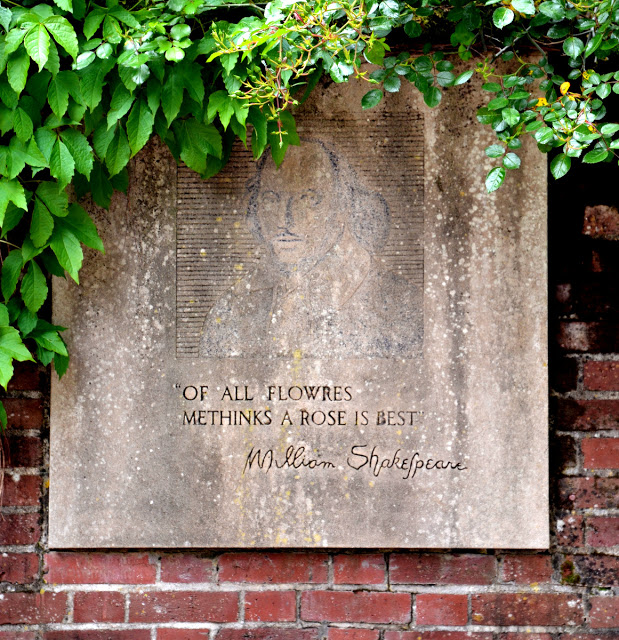
William Shakespeare rose sign

It all began when we bought our first house. I was a young mother with two girls who was giddy with the possibilities of having her very own spot of garden to grow roses in.

local rose garden with family

We would take our girls around to the local rose gardens where so could see what types of roses to pick for our new rose garden.

The rose garden was located in the front yard along the side of the driveway.  At the time, money was tight so we ended up purchasing twenty different ‘grade 1 1/2’ roses for $3 each at Home Depot.

Exploring the World of Roses

‘Grade 1’ roses are considered to be the cream of the crop and the best type to purchase based on the their size and number of canes (stems).

A few months later, my roses were in full bloom and the talk of the neighborhood (we definitely stuck out from the surrounding neighbors since we had taken out a large chunk of lawn to grow a LOT of roses).

love affair for roses in a rose garden

A Growing Rose Obsession

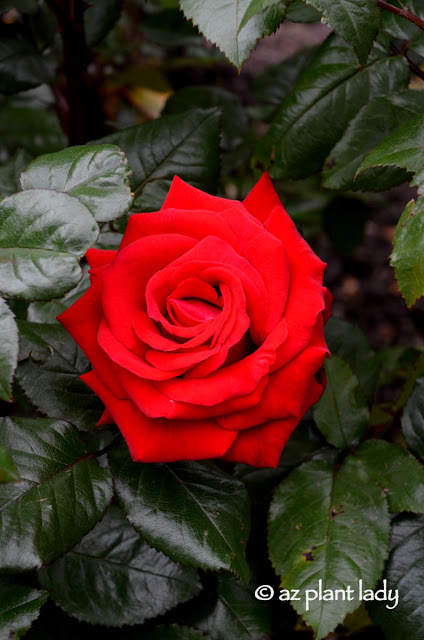
Many people ask if I had a favorite hybrid tea rose and the answer is “yes”.  Mr. Lincoln with its deep red blossoms which were incredibly fragrant always stands out in my memory of our first rose garden. At one time, it reached almost 6 ft. tall and had over 30 blossoms covering it.

Three years later, I had gone from 20 rose bushes to 40 – all a different type of hybrid tea or shrub rose.  I realize that I maybe went a little overboard, but I loved growing roses – no two roses were the same.

Roses Across Continents

Whenever we were traveling, if there was a rose garden nearby – we would visit it…

The rose garden at Kilkenny Castle in Ireland love affair for roses

The rose garden at Kilkenny Castle in Ireland.

Noelle Johnson posing by the roses and the castle.

That’s me posing by the roses and the castle in 2003.

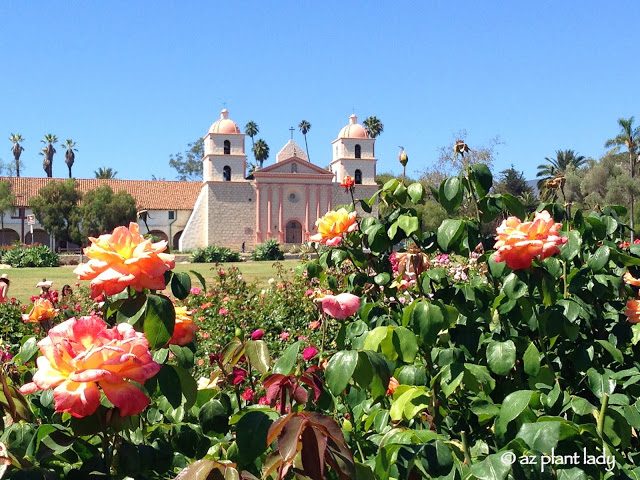
Santa Barbara Mission rose garden in California

Santa Barbara Mission rose garden in California

Passing on the Love

After we sold our home in Phoenix, we moved out to the suburbs to be closer to my husband’s job. As we built our new home, I knew that I did want room for a few roses.

Love Affair With Roses: Looking Forward and Back

After adopting our three youngest kids, I was eager to share my love for roses with them.  They each picked out their own rose from a rose catalog and helped plant them.  It was a fun experience, complete with finding earthworms in the soil and more.

While their roses did grow, they didn’t have the best location, which was rather shady and so they turned out rather straggly.  Needless to say, they were pulled out a couple of years later.

Captivating Rose Destinations

Even though I didn’t have roses growing in my garden, I still went out of my way to enjoy them whenever I found myself on the road.

International Rose Test Garden in Portland, Oregon. love affair for roses

International Rose Test Garden in Portland, Oregon in 2015.

Stopping to smell the roses in Santa Barbara, CA.  love affair for roses

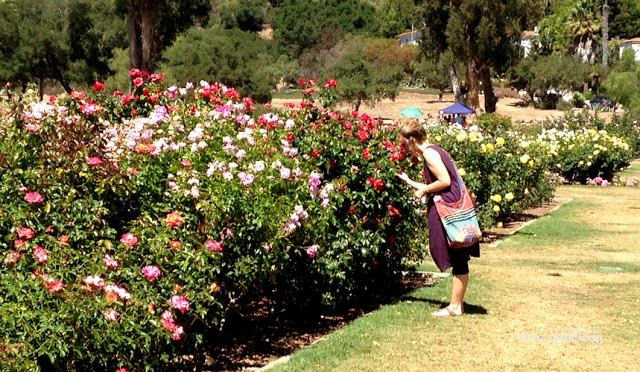
Stopping to smell the roses in Santa Barbara, CA in 2016.

A Rekindled Love Affair for Roses

A few years ago, I realized that my love affair with roses never ended and that it was time to think seriously about growing a few again.

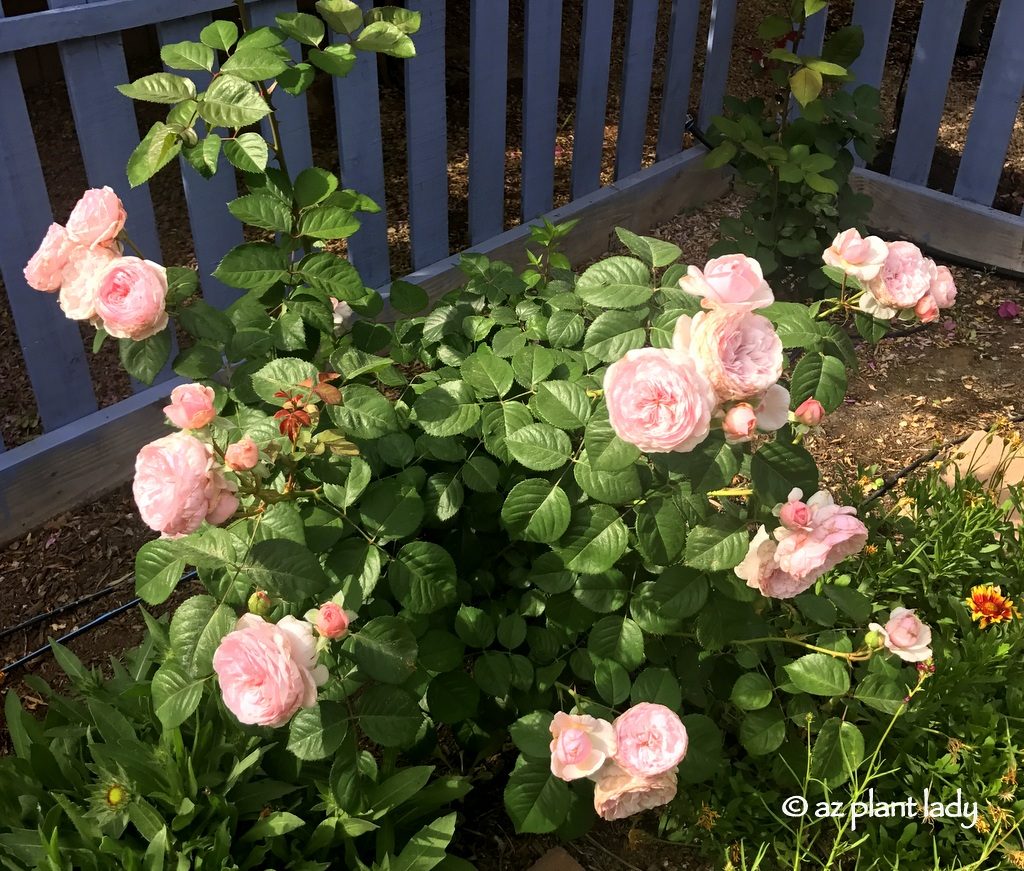
Surprisingly, not a single one is a hybrid tea rose. In fact, all are David Austin shrub roses.

Shrub roses are easier to grow, more resistant to disease and insect pests and smell amazing!

One of the cool aspects of being a local garden expert is the the folks at David Austin send me free roses to test in my garden. In return, I tell them how they do in the desert climate and share my findings with you too!

love affair for roses with pink roses in my garden
‘Olivia Rose’ David Austin Shrub Rose

My favorites for the desert garden are ‘Ancient Mariner’, ‘Darcey Bussell’, ‘Lady of Sharlott” and ‘Olivia Rose’. All of these are available through mail order via this link.

Embracing the Rose Growing Passion

I am so happy that I have returned to growing the plant that inspired my passion for gardening years ago.

Winter is the best time to add new bare root roses to the desert garden. I invite you to consider adding some to your garden.

What Kind of Roses Should You Grow?

No matter where you live, you will see the same shrubs being used over and over again in countless landscapes. While the shrubs may be attractive, their overuse throughout neighborhoods creates a boring appearance because they are so common.

The Allure and Overuse of Oleanders

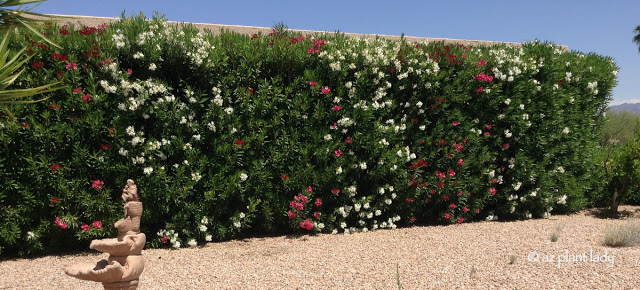
oleander shrubs in a row

In California, Nevada, and Arizona, oleanders have held a prominent spot in the landscape for years. Their popularity is due to their lush evergreen foliage, ability to withstand intense heat, and their pretty flowers.

However, their overuse in many areas makes their beauty less impactful and frankly, almost forgettable.

The Power of Unpredictability

 At a recent conference, this point was put quite succinctly by the head of horticulture for Disneyland who said,

“When things are expected (in the landscape), they become less powerful and impactful”.

His statement sums up what happens when we use the same plants over and over.

Oleanders’ Ailment: Oleander Leaf Scorch

In the case of oleanders, there is another problem.

Oleander leaf scorch

Oleanders are susceptible to a fatal disease called, oleander leaf scorch. This disease has come from California into Arizona where it is popping up in neighborhoods in Phoenix and also Lake Havasu. I have consulted with several cases affecting large, mature oleanders in Arcadia, Biltmore, and Moon Valley areas in Phoenix. 

This bacterial disease is spread by leaf-hopper insects and there is currently no known cure or control available. Infected oleanders slowly decline over 2-3 years before dying. To date, dwarf oleanders have not shown signs of the disease, only the larger forms. But, that could change sometime in the future.

Seeking a Shrub Alternative: Introducing Hop Bush 

Objectively, there’s a lot to like about oleanders; they thrive in hot, dry climates with minimal fuss, have attractive dark green foliage, and add color to the landscape when in flower. However, their overuse in the landscape makes them less impactful and coupled with their susceptibility to oleander leaf scorch, people want an alternative. 

You can learn more about this disease that affects oleanders here.

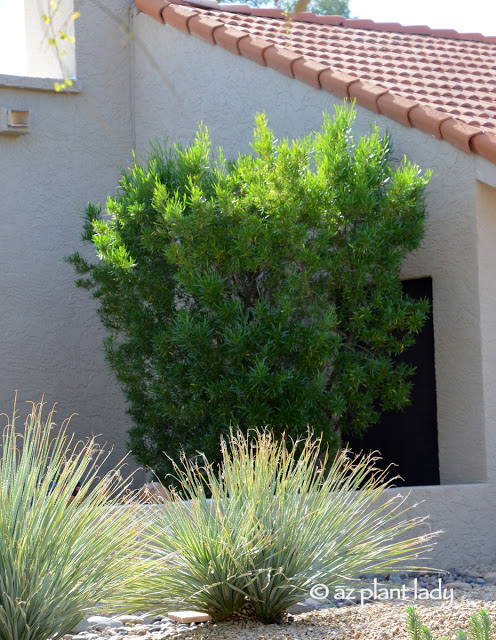
Hop Bush along a house wall

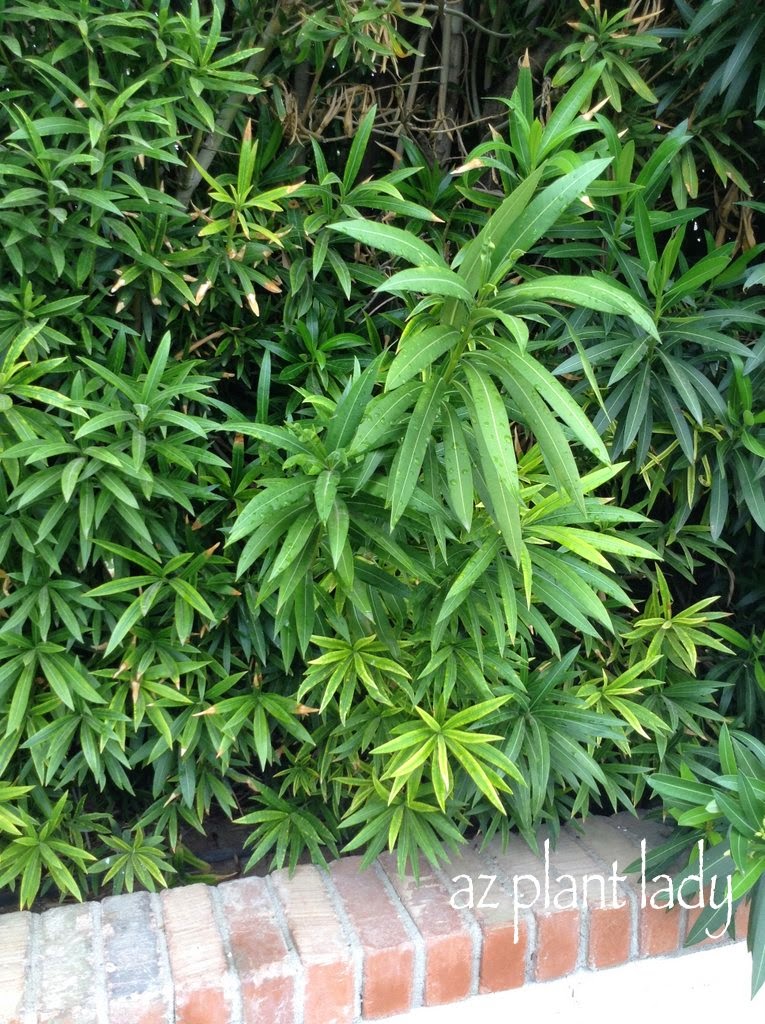
When asked for another option for the large, tall forms of oleanders, I recommend Hop Bush (Dodonaea viscosa), also known as Hopseed Bush.

Grab my FREE guide for Fuss-Free Plants that thrive in a hot, dry climate!

Hop Bush is a Versatile Landscaping Solution

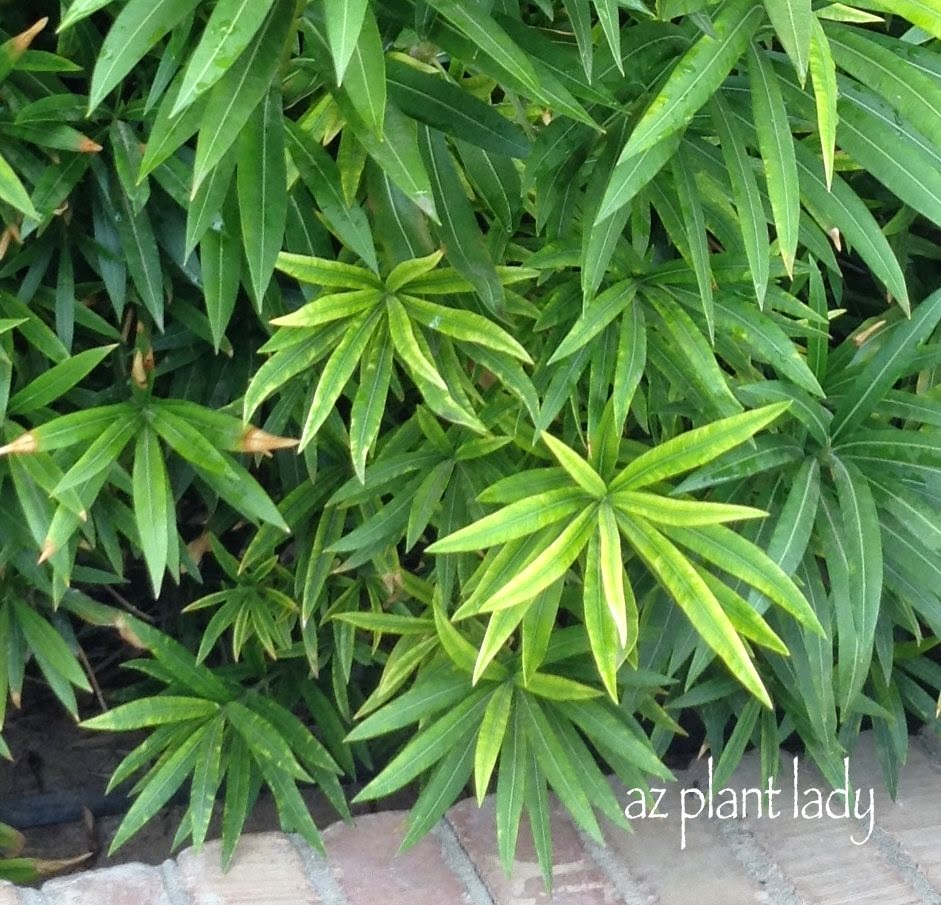
This native desert shrub has attractive, evergreen foliage and a similar growth habit to oleander. They grow up to 12 feet tall or prune to a shorter height.

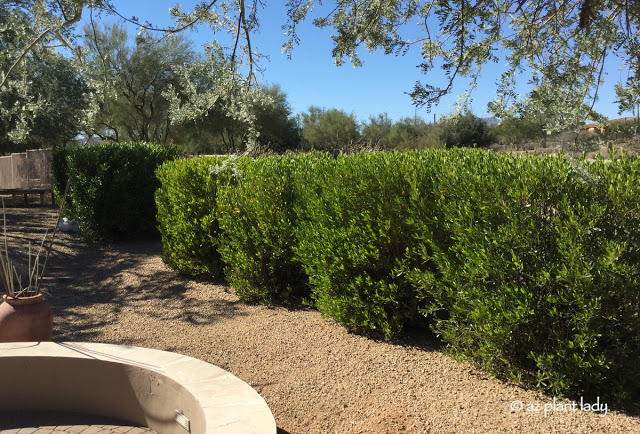
Hop Bush is a green shrub

Use Hop Bush in the same ways as oleanders to provide a nice green hedge or privacy screen.

Hop bush flower

Hop bush flower

Hop Bush has Elegance in Foliage

While they don’t have colorful flowers; they have lovely foliage that is only mildly poisonous as opposed to oleanders which are highly toxic. Hop bush has a lovely natural shape or prune as a formal hedge.

Hop bush  as a hedge

Share Your Experience

Have you ever seen hop bush growing in the landscape?  Your insights and experiences are invaluable – feel free to share them in the comments below.

newly-planted landscape

Have you ever driven by a newly-planted landscape?  If so, you probably noticed that many of the plants were quite small.  

I like to joke that sometimes you need a magnifying glass just to see the new plants. But as small as they are, within a short amount of time, those plants start to grow.  

overgrown plants are unattractive.

Look at the same landscape three years later. The plants are well-established and look great.  

Fast forward eight-ten years, and you may start to see signs of some plants becoming overgrown and unattractive.

When this happens to shrubs, we can often push a ‘restart button’ (for most types of shrubs) and prune them back severely in spring using a good pair of loppers, which reduces their size. I use my Corona loppers to do major pruning of my shrubs.

However, there are some plants where this approach doesn’t work.

Let’s identify a few of these plants and how to deal with them once they outgrow their allotted space or become filled with old, woody growth.

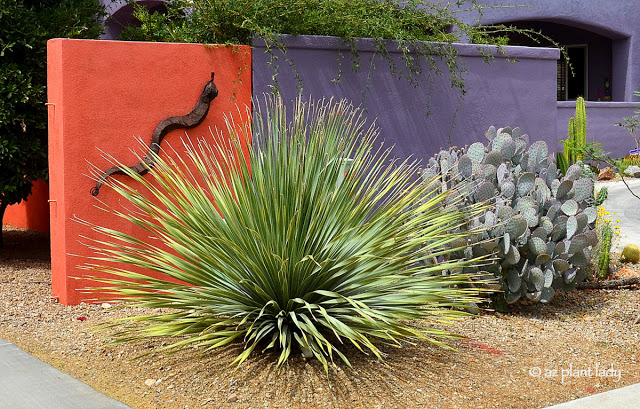
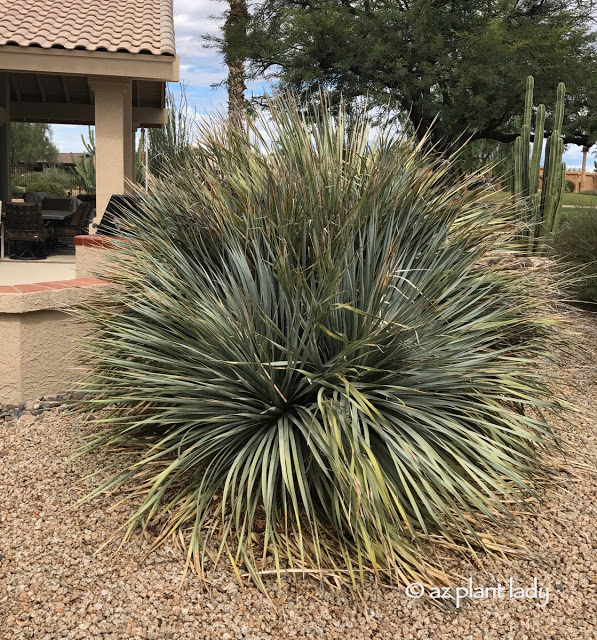
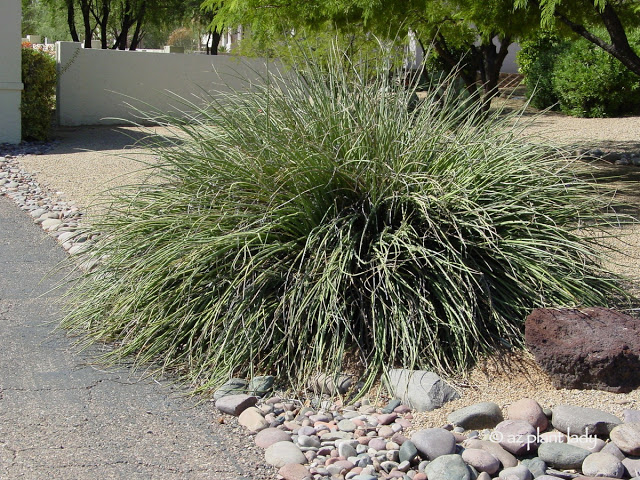
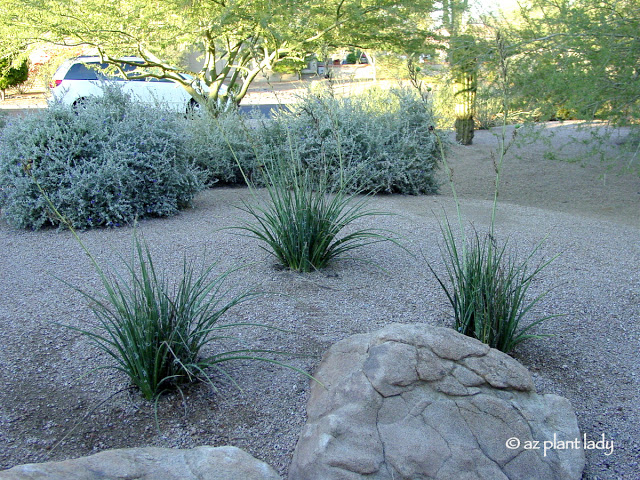
Desert Spoon (Dasylirion wheeleri)

Desert Spoon (Dasylirion wheeleri)

Desert spoon is one of my favorite plants.  I love how its blue-gray, spiky leaves add texture to the garden and contrast with plants that have darker green foliage.  

Old, Overgrown Plants

After ten years or more in the landscape, desert spoon can start to take on a ragged, rather unattractive appearance, as well as grow quite large.

When this happens, I recommend that they be removed and a new one planted in its place.  

Now, some of you may think that may seem wasteful, but I invite you to take another look at your landscape and the plants within it.

Your outdoor space isn’t static and unchanging. Its appearance changes with the seasons with plants blooming at different times. Trees gradually extend the amount of shade they provide and plants change in size.  

A newly planted garden doesn’t look the same through the years, it changes.  

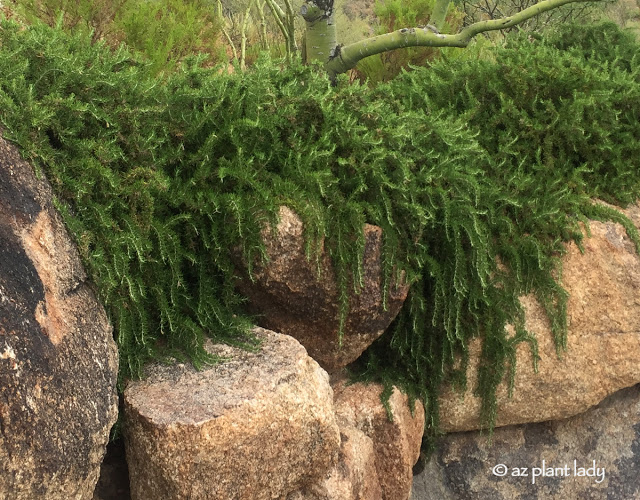
Trailing Rosemary (Rosmarinus officinalis 'Prostratus')

Trailing Rosemary (Rosmarinus officinalis ‘Prostratus’)

Rosemary is a good choice for those who want rich, dark green color in the garden. Bees love the light blue flowers that appear in late winter and spring, and the aromatic foliage can be used to flavor your favorite dishes.  

Old, Overgrown Plants

But, as time passes, it does get bigger, outgrowing its original space.  

Old, Overgrown Plants

When this happens, people start to shear their rosemary, which is stressful for the plant and contributes to sections of branches dying.

For those who don’t like the formal look, pruning rosemary back severely would be your first impulse. But, the problem with rosemary is that they don’t respond well to severe pruning.

So again, in this case, it’s best to pull out the old rosemary and add a new one, which will provide beauty for several years.

 Rosemary hedge

Rosemary hedge

To avoid having to remove and replace rosemary too often, allow them plenty of room to grow to their mature size.

Red Yucca (Hesperaloe parviflora)

Red Yucca (Hesperaloe parviflora)

Red yucca is prized for its succulent, green leaves that resemble an ornamental grass and its coral flowers, which appear spring through fall.

red yucca Overgrown Plant

Once it has been growing seven years or more, red yucca may overwhelm the landscape visually. This is particularly true if the area it’s growing in isn’t very big.

Occasionally, some people will try to remove the outer leaves at the base. However, this is laborious and only serves to stimulate red yucca to grow back faster.

In those situations, I tell people that their plant has had a nice life, but it’s time to start over.

Newly-planted red yucca

Newly-planted red yucca

You may be thinking, why use plants that you’ll only have to replace after seven to ten years?

Well, all three of these plants add beauty to the landscape and are low-maintenance.

Another way to think of it is to compare your landscape with the interior of your home.  Do you make small changes to the decor of your home every few years to keep it looking fresh and attractive? The same should be true of the outside.

Replacing a few plants after seven years or more isn’t expensive. Don’t you think that the beauty these plants offer to your outdoor space makes them worth it?

What have you replaced in your garden recently?

Got Old, Overgrown Plants? Know When to Prune or Replace

The Beauty and Challenges of Growing Tropical Bird of Paradise in the Desert Southwest
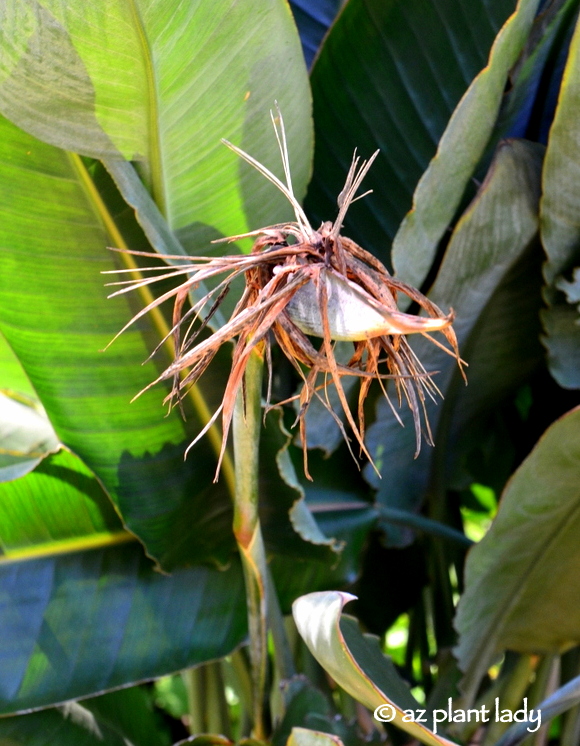
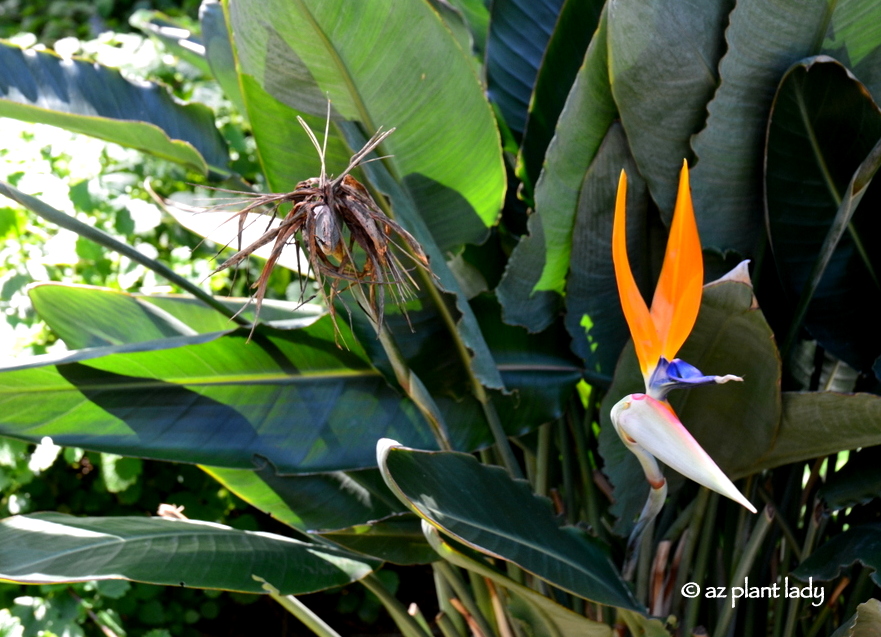
tropical bird of paradise that looks dead and beat up

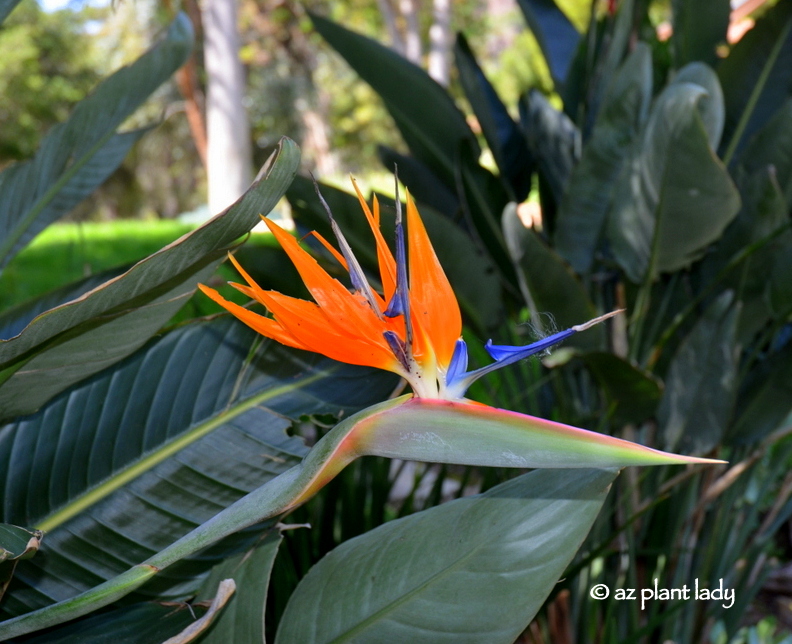
Tropical bird of paradise

Nature’s Unfairness to Tropical Bird of Paradise Flowers

Sometimes, life isn’t fair. Especially when nature hasn’t endowed you with any noticeable outward beauty. What worsens the situation is that you’re a flower, expected to be beautiful.

The Ugly Stepsister - The Floral Edition with tropical bird of paradise

When you are a flower and are supposed to be pretty

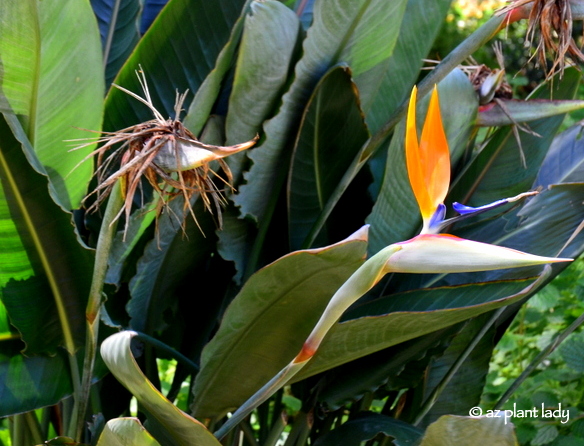
Comparing the ‘Ugly Stepsister’ to Her Gorgeous ‘Sister’

What exacerbates the situation is when you find yourself being compared to your ‘sister,’ who possesses a breathtakingly stunning appearance.

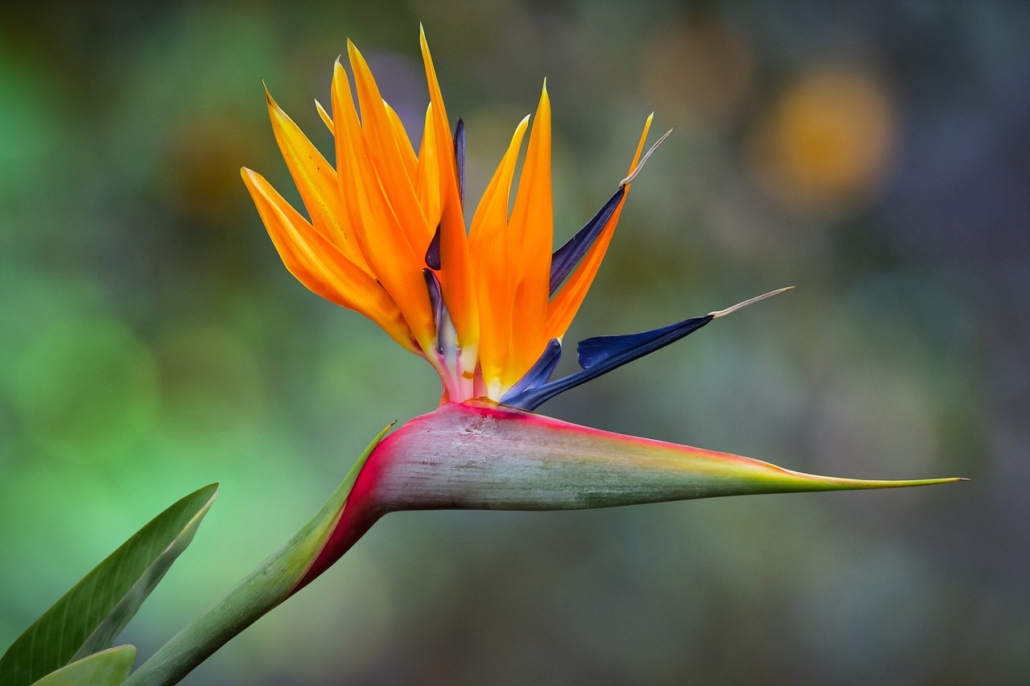
tropical bird of paradise

Imagine having to stare at her vibrant colors and exquisite shape all day long?

It doesn’t matter which angle you use, there is no improving your outward appearance. So you decide to concentrate on inner growth and decide to be the best flower you can be on the inside.

comparing two flowers from the same plant

Beautiful tropical bird of paradise bloom

6 Tips for Growing Tropical Bird of Paradise in the Desert Southwest

Life can be challenging for tropical bird of paradise flowers in the desert Southwest. These exotic blooms, known for their striking beauty, often struggle to thrive in the harsh desert climate. But with the right care and attention, you can cultivate inner beauty and help these stunning flowers reach their full potential.

In the world of flowers, outward beauty is highly prized. Unfortunately, not all blooms are created equal. Some may find themselves overshadowed by their more vibrant and exquisite counterparts. Imagine being a lovely tropical flower, having to compete with your drop-dead gorgeous ‘sister’ day in and day out.

bird-of-paradise

Vibrant colors and exquisite shape

But there’s hope for these less glamorous blooms. Just like the ‘ugly stepsisters’ from Cinderella, they can focus on their inner growth. If you’re interested in nurturing tropical bird of paradise in the desert Southwest, here are some essential tips to help them thrive:

1. Choose the Right Variety:

Not all tropical bird of paradise plants are created equal. Opt for varieties like Strelitzia reginae or Strelitzia juncea, which are better suited for desert conditions.

2. Sunlight:

Provide them with ample sunlight. These plants love full sun but can tolerate some shade during the hottest part of the day. A side yard is a great location for these tropical plants.

3. Well-Draining Soil:

Plant them in well-draining soil to prevent root rot. Adding organic matter to the soil can help improve drainage.

4. Watering:

While tropical bird of paradise plants need regular watering, be mindful not to overwater. Allow the soil to dry out slightly between waterings. Attach an irrigation line near the base of the plant.

5. Protection from Frost:

Protect the tropical bird of paradise from frost during the winter months, as they are sensitive to cold temperatures.

6. Pruning:

Prune dead or damaged leaves to encourage new growth and maintain a tidy appearance, particularly after an exceptionally cold or hot snap.

Nurturing Tropical Bird of Paradise in the Desert Southwest
In the arid desert climate of the Southwest, tropical bird of paradise plants require extra care and attention to thrive. By following these guidelines and focusing on their inner growth, you can help these beautiful flowers reach their full potential, even in the face of nature’s challenges.
So, the next time you encounter a less-than-perfect bloom, remember that with a little love and care, even the ‘ugly stepsisters’ of the flower world can shine in their own unique way.

ugly stepsisters

I hope you enjoyed the floral edition of the ‘Ugly Stepsister’.

Drought-Tolerant Landscapes – Colorful or Boring?

Book Review: Potted, DIY Stylish Garden Containers

Disclosure: This blog post contains affiliate links. If you click through and make a purchase, I may receive a commission (at no additional cost to you). Thanks for your support in this way.
Do you have a container, or two, filled with flowers or maybe a succulent? Chances are you do. Many of us settle for the bland shades of brown or beige when choosing pots and miss out on an excellent opportunity to add interest and color to our outdoor spaces.
I am a strong proponent ditching boring neutrals in favor of colorful pots with unique shapes and textures in my ongoing attempt to encourage people to think of plant containers as outdoor decor. As a result, I was thrilled with I was contacted by Annette Gutierrez, one of the authors of Potted: Make Your Own Stylish Garden Containers and asked to review her book.

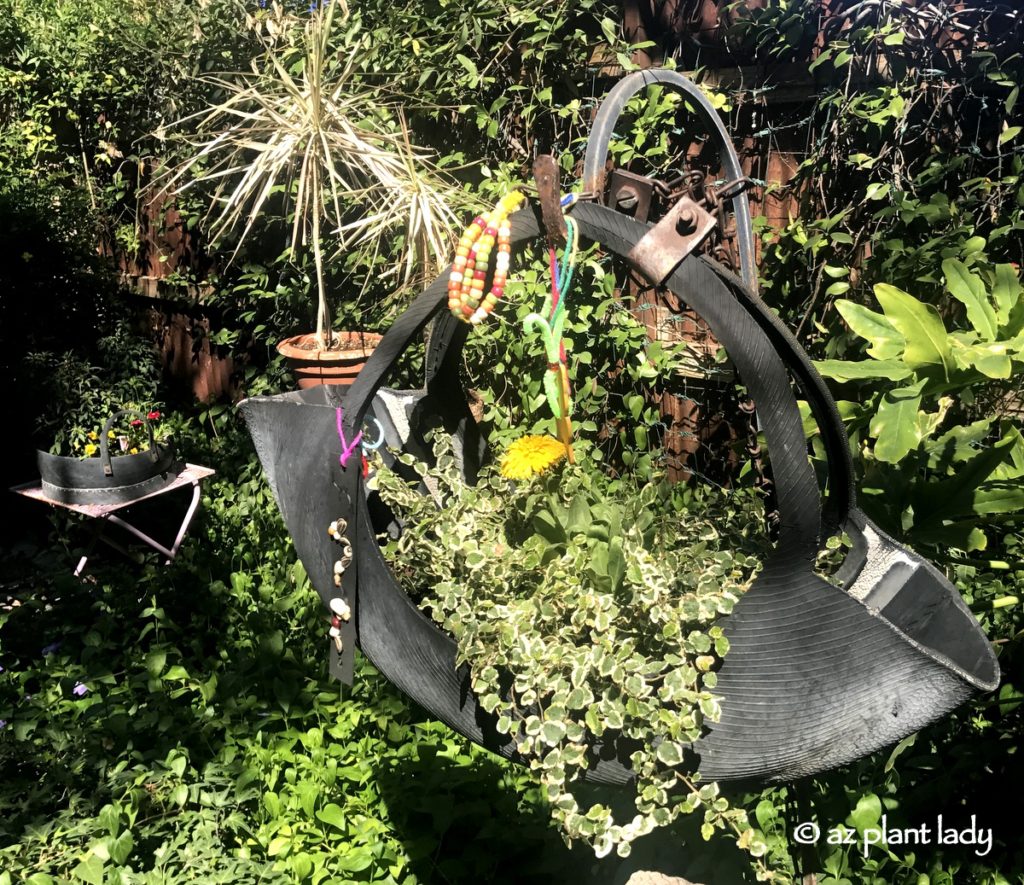
Innertube from an old tire converted into a planter at the Tucson Botanical Garden.

Innertube from an old tire converted into a planter at the Tucson Botanical Garden.

Within the pages of Potted, Annette and her co-author, Mary Gray, inspire as they show the reader how to create unique and unusual containers that create instant interest.

During my garden travels, I seek everyday items that are reimagined and converted into unorthodox planters such as a recycled tire innertube. 

Book Review: Potted, DIY Stylish Garden Containers

Annette and Mary refer to themselves as decorators rather than gardeners and own a store in Los Angeles, aptly named Potted where they create innovative receptacles for plants using everyday items such as cinderblock, PVC pipe, and even old wood doors to name but a few. 

Book Review: Potted, DIY Stylish Garden Containers

If you have ever shopped for colorful or unique containers, you’ve undoubtedly experienced sticker shock at the high prices and settled for a boring, but sturdy terra-cotta pot. Over twenty container ideas await the reader, each of which, meet the following criteria:

  • It must be affordable
  • Materials must be easy to find
  • A good DIY project for the average person

I must admit that after finishing the book, I was looking at ordinary items like paint cans and plastic garbage pails in a different light – decorated and filled with plants.

I can hardly wait to get started! How about you?

Disclosure: I received a copy of ‘Potted’ free of charge for my honest review.

A Rusted Pick-Up, Trash Can Containers and a Kitchen Garden

Growing Garlic? Use the Greens to Flavor Your Favorite Dishes

Do you grow garlic in your garden? If so, you know that it takes a long time to grow with planting in October and harvesting it in May. During the long growing period, the leafy green tops of the garlic plant are all that is visible while the garlic bulb is growing below ground.

But, did you know that garlic greens can be used in some of your favorite dishes? Here is how I use them…

It’s always fun to find new ways to enjoy the vegetables in your garden. Have you ever tried garlic greens or other non-traditional parts of vegetables?

Growing Garlic? Use the Greens to Flavor Your Favorite Dishes

For tips on how to grow your own garlic, click here.