Transforming Your Bare Block Wall: Exploring Decorative Options
Enhancing Your Outdoor Space
Do you need decorative block wall options for a bare block wall surrounding your backyard?
If your residence is located in California or the Southwest, the chances are high that you have encountered this common architectural feature. Although these walls are known for their durability, they often lack aesthetic charm, leaving much to be desired in terms of their appearance.
Thankfully, there are things you can do to make them look better without spending a lot of money to do so.
Here are my top 3:
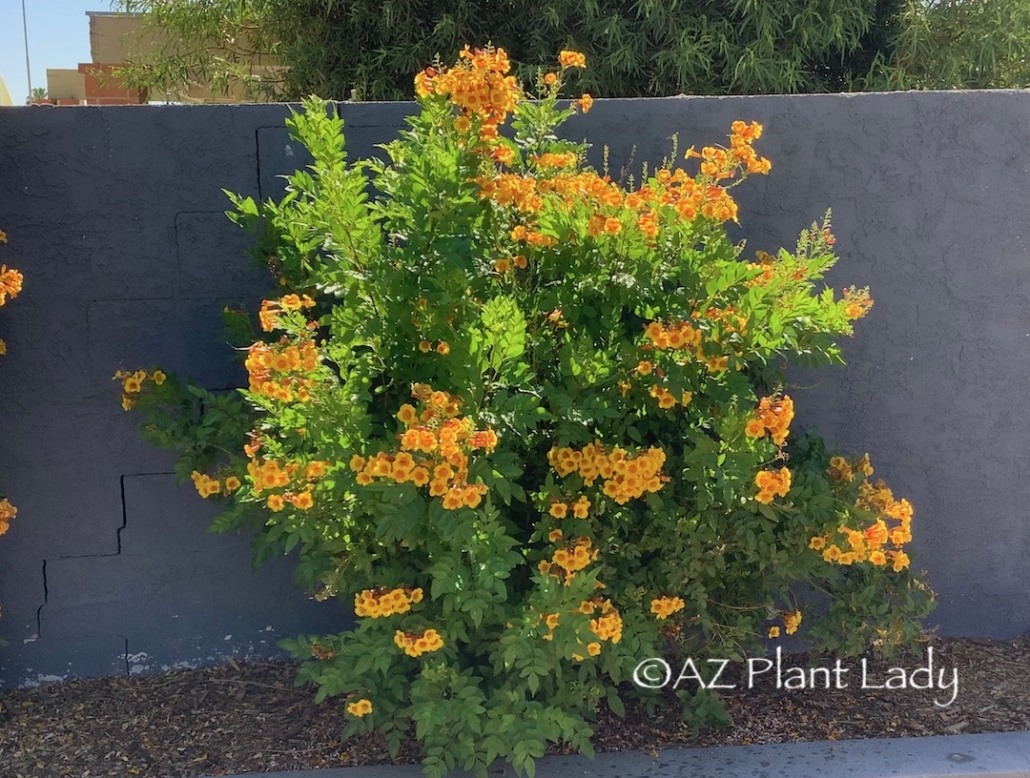
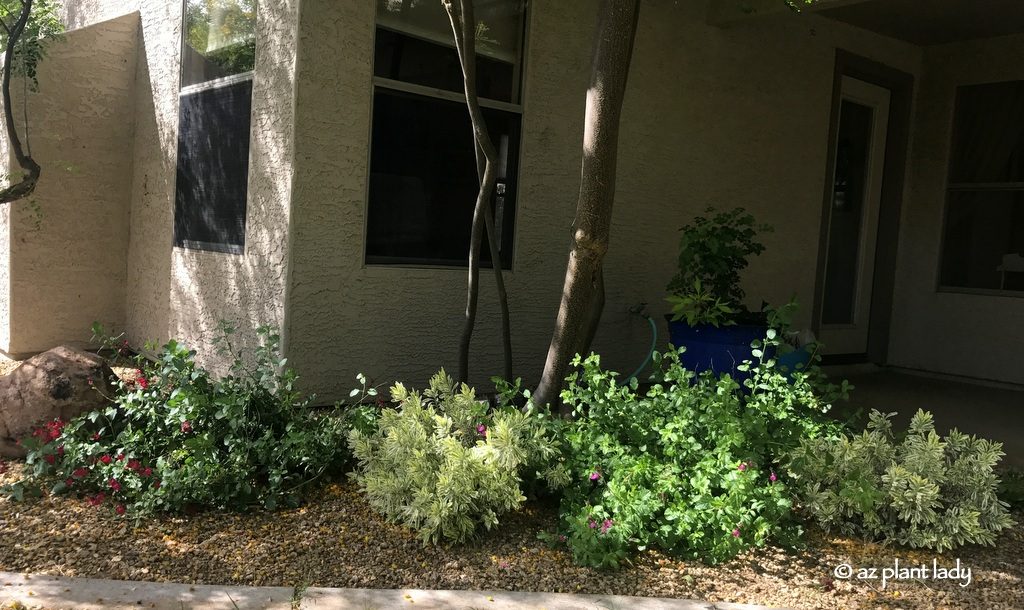
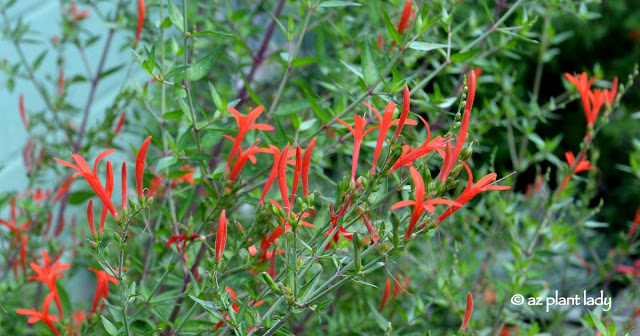
1. Planting Large Shrubs
Plant large shrubs along the wall. Look for shrubs that grow at least 5 feet tall and wide. Be sure to allow enough room for the shrubs to grow to their mature size – no ‘poodle-pruning.’ The shrubs will look great while adding texture and color like the ‘Sparky’ Tecoma shrub above. Note: Many people get this wrong by either spacing shrubs too closely together or excessively pruning them.
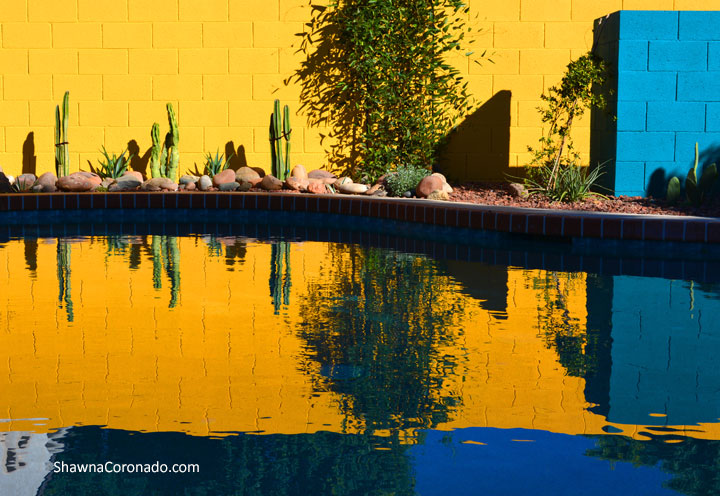
2. Painting Your Wall for Decorative Block Options
Paint your wall a colorful shade of blue, purple, red, or even yellow. This is a common design style in the Southwest and several of my clients have employed this design strategy. You can add plants like shrubs or cacti along the painted wall for added interest. Garden art also looks great on painted walls and is a useful option when there isn’t enough room for plants to grow.
3. Using Wood Planks
Cover the wall with pine wood planks, arranged horizontally, and stain them an attractive color. The planks of wood can be attached to metal stakes along the back. This creates a very modern look with an organic element. A welcome bonus is a wood decreases the radiated heat that comes off of block walls in summer.
So, if you are tired of looking at a bare block wall, I hope you will explore one of these options.
https://www.azplantlady.com/wp-content/uploads/2022/06/IMG_6538.jpeg8161080arizonaplantlady@gmail.comhttp://www.azplantlady.com/wp-content/uploads/2018/10/favicon.pngarizonaplantlady@gmail.com2022-07-14 07:26:002023-09-22 11:51:05Decorative Options to Beautify Bare Block Walls
Have you ever had a big secret that you were dying to tell?
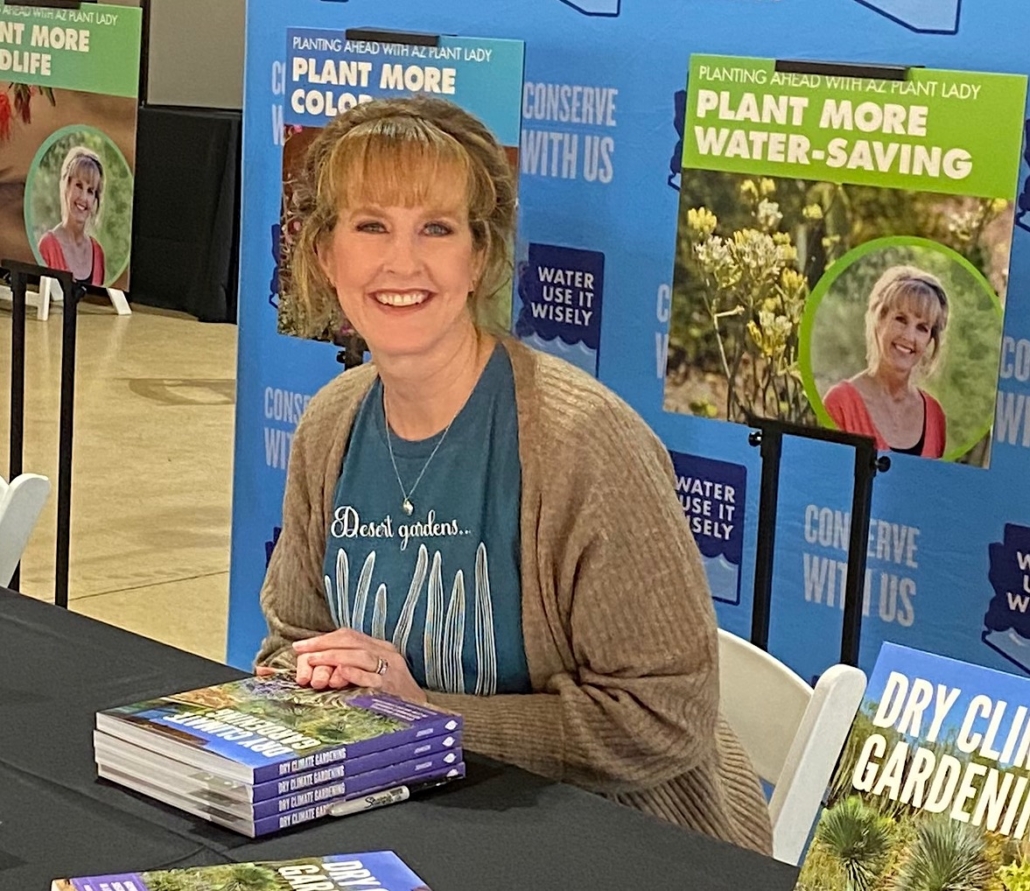
The Big Reveal: My New Dry Climate Gardening Book
Well, I have been keeping a lid on a big project that has consumed most of my time over the past year and now I can finally spill the beans to you…
I have written a book on how to garden in a dry climate!
Oh, it feels so good to be able to tell you my exciting news!
Within the pages of the dry climate gardening book, I share how to create, grow, and maintain a beautiful garden that thrives in a hot, dry climate – whether you live in the desert or in semi-arid Mediterranean regions, you will get helpful advice and practical tips.
A Quarter-Century of Horticultural Expertise
I’ve taken what I’ve learned in my 25+ year career as a horticulturist and landscape consultant and put it all here. As a California native and resident of Arizona, I know the unique challenges that we face gardening where dry climate conditions are prevalent, coupled with hot summers.
I can hardly wait for you to see all I have included within the dry climate gardening book pages!
https://www.azplantlady.com/wp-content/uploads/2022/06/Screen-Shot-2022-06-16-at-1.52.54-PM.png626500arizonaplantlady@gmail.comhttp://www.azplantlady.com/wp-content/uploads/2018/10/favicon.pngarizonaplantlady@gmail.com2022-07-07 10:03:002023-09-22 12:44:12I’ve Written a Book!
Navigating the Hot Early Summer in Your Desert Garden
The Scorching Reality of Early Summer
I don’t need to tell you that early summer desert garden is hot. In mid-June, we typically experience several days of extreme heat. I have many people who ask me what garden tasks CAN they do in their garden right now.
Well, the answer is an easy one…
Do as little as possible.
Embracing Minimalism in Garden Tasks
June is a very stressful time of year for plants because it is very hot and dry so it makes sense to heatproof your garden. Both of these conditions make it hard on plants. In fact, June is the hardest time of year for most plants.
In other words, don’t add new plants, do unneeded pruning, or fertilize.
If you find yourself with new plants still in their nursery pots, put them in a shady spot and water them regularly as they will dry out fast!
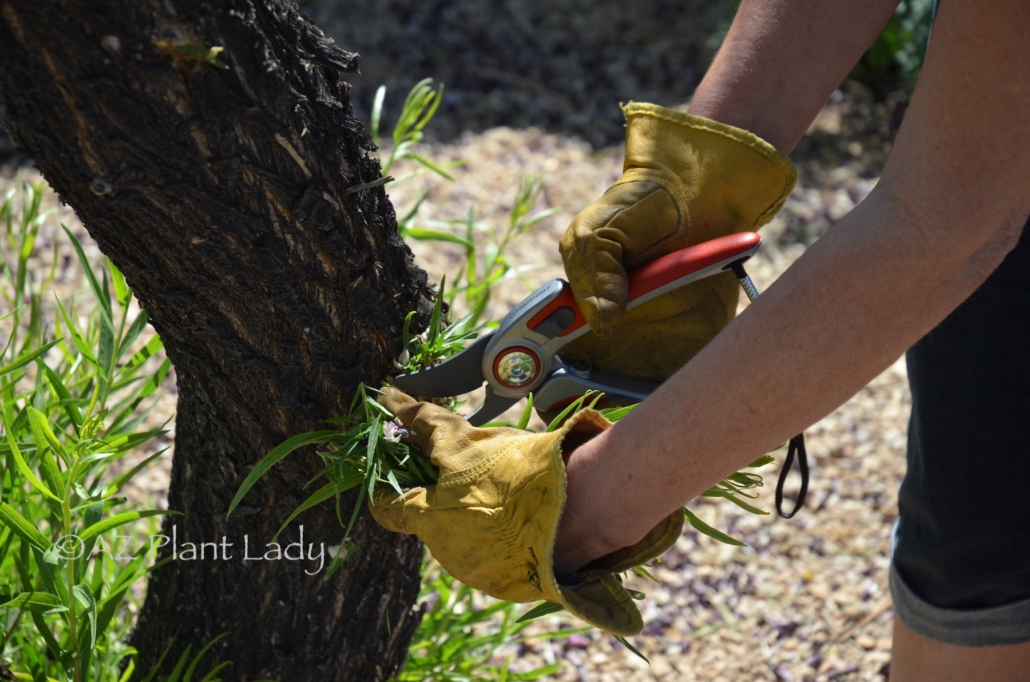
Careful with New Additions and Pruning
Pruning is also stressful for plants so limit your pruning to getting your trees ready for monsoon season. If you have some suckers growing mature trees (see photo above), you can prune them off.
Don’t fertilize plants now. Most plants don’t need it with the exception of flowering annuals, herbs, vegetables, and smaller palm trees.
Keep a Watchful Eye on the Summer Desert Garden Plants
In the meantime, get out early in the morning before it gets too hot to make sure there aren’t any plants that are struggling. You may need to add more water or provide temporary shade.
Toward the end of June, the monsoon season will be on its way with extra humidity and hopefully rain, which will provide some relief for plants.
https://www.azplantlady.com/wp-content/uploads/2022/06/pruning-copy.jpg11921800arizonaplantlady@gmail.comhttp://www.azplantlady.com/wp-content/uploads/2018/10/favicon.pngarizonaplantlady@gmail.com2022-06-28 10:00:052023-09-22 12:42:58What You Shouldn’t Be Doing in the Early Summer Garden
The Reality of Vegetable Gardening: Unveiling the Secrets
The Pressure of Unrealistic Standards for Vegetables
Have you ever found yourself intimidated by fashion magazines filled with beautiful celebrities and models who are then photoshopped to remove every little imperfection? Or perhaps an Instagram account where the home is filled with natural light, dust-free, and no mislaid items anywhere?
I must admit that I don’t like to follow accounts like that as they promote an unrealistic view and leaves me feeling like something is wrong with me when I don’t look perfect and my house doesn’t either.
Escaping Unreal Expectations
This type of unreal perfection extends to the garden too! Just between you and me, I’ve been to many gardens that are highlighted on social media and they never look quite as good in person.
Believe it or not, vegetables also fall into this unrealistic realm when shown in magazines and online. Articles filled with photographs of perfectly-sized vegetables without a speck of dirt on them can be intimidating to the average vegetable gardener.
Unearthing the Dirty Secret of Vegetable Gardening
Well, I’m here to tell you the truth and reveal two dirty secrets of vegetable gardening with some assistance from my little helper.
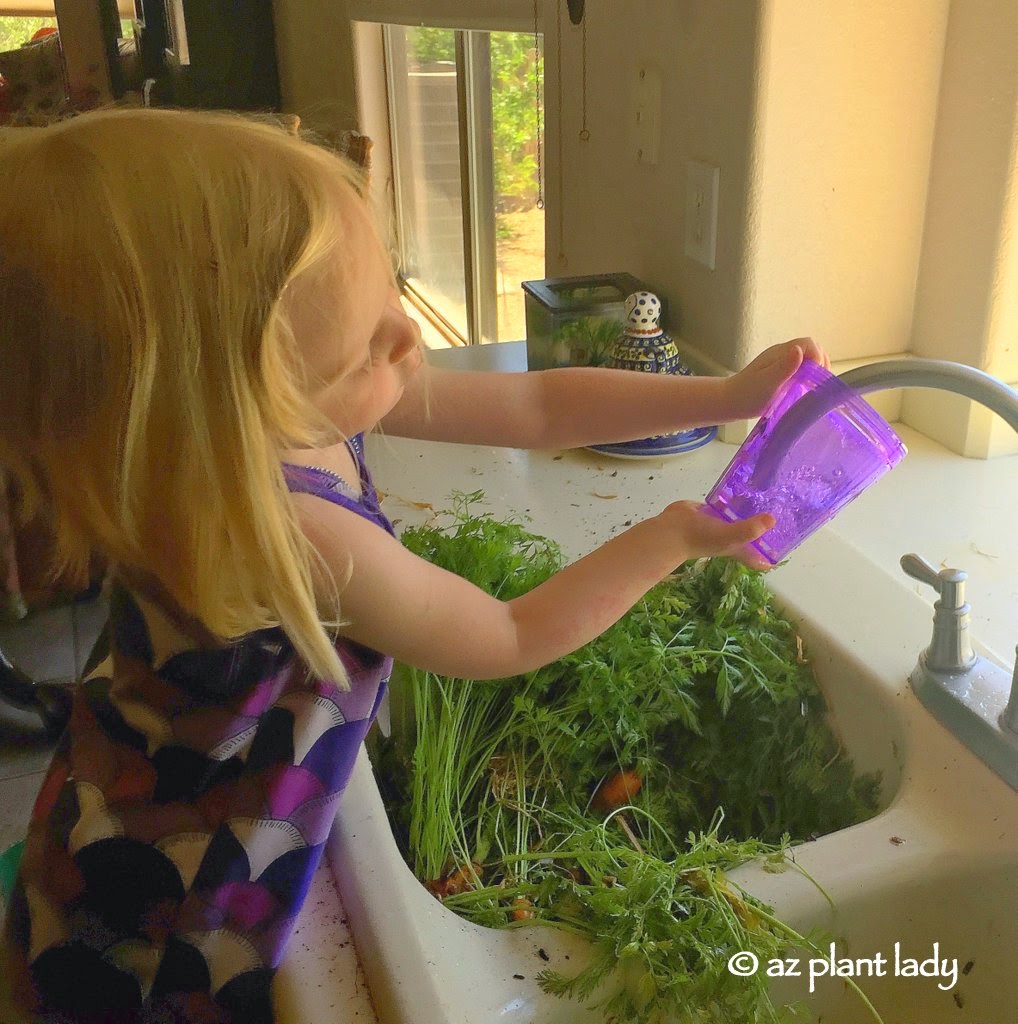
Meet Lily: A Gardening Companion
This is my granddaughter Lily who loved to help me in the garden when she was little. She was always a willing helper when it came time to harvest vegetables from my garden.
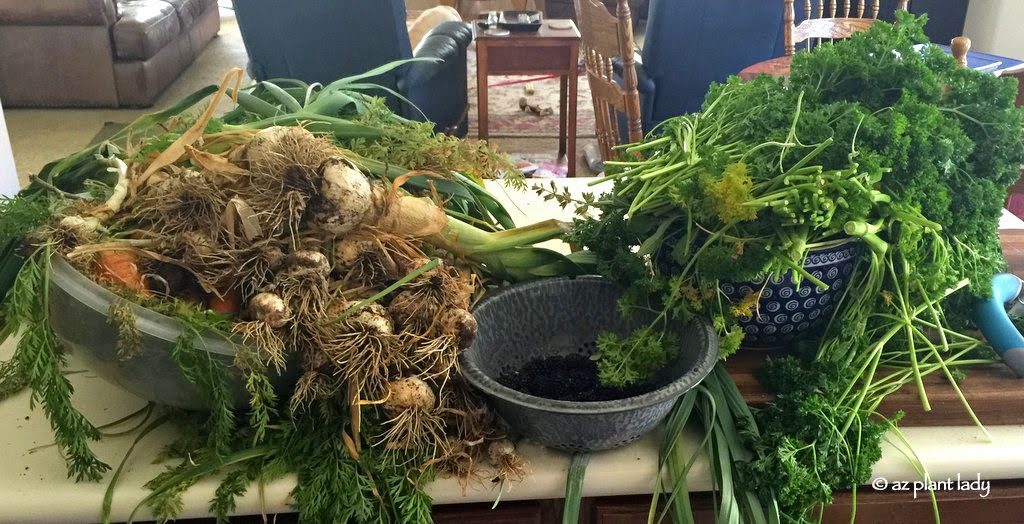
Toward the end of spring, it was time to harvest the last head of broccoli, pick the carrots, pull the garlic, cut parsley, and harvest the first of our blackberries.
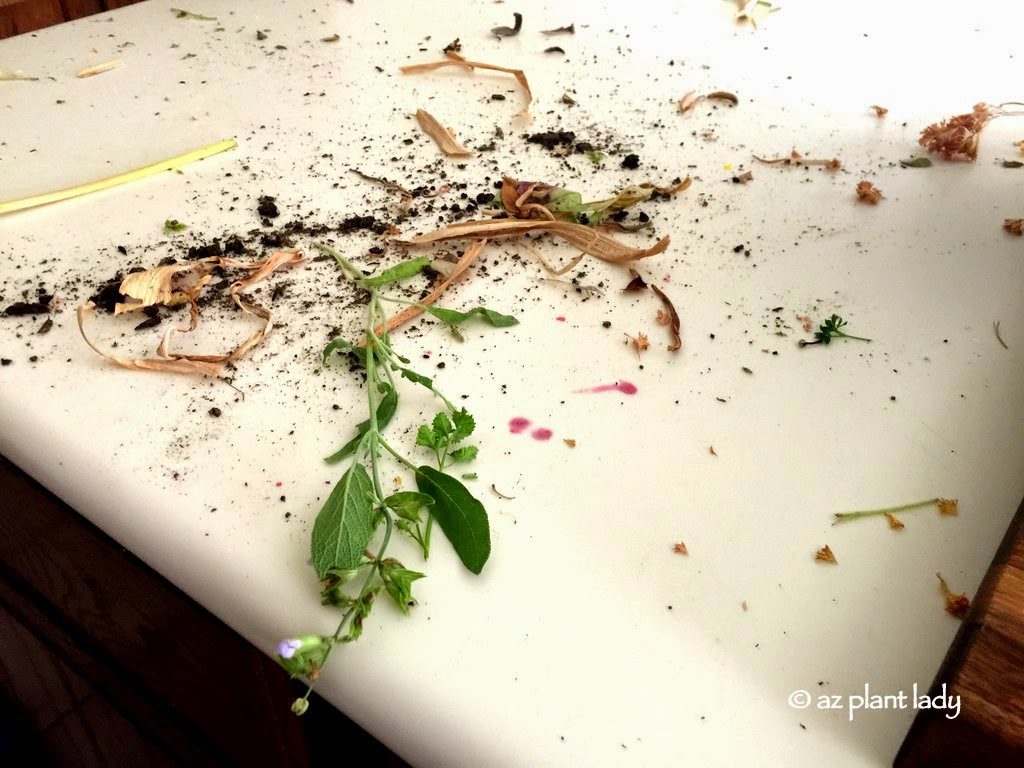
The Real Harvest
This is what our harvest looked like. Not particularly photo-worthy for a magazine or social media, is it? But, this is the reality of what it looks like.
The Dirty Secret: Vegetables Grow in Dirt
If you haven’t guessed the secret about vegetable gardening – it’s that it is DIRTY!
Think about it – vegetables grow in the dirt. They don’t come out clean. In fact, it can take a while to clean the dirt away.
Lily was excited to help me clean the vegetables, so she would fill her ‘My Little Pony’ cup over and over and pour them over the carrots.
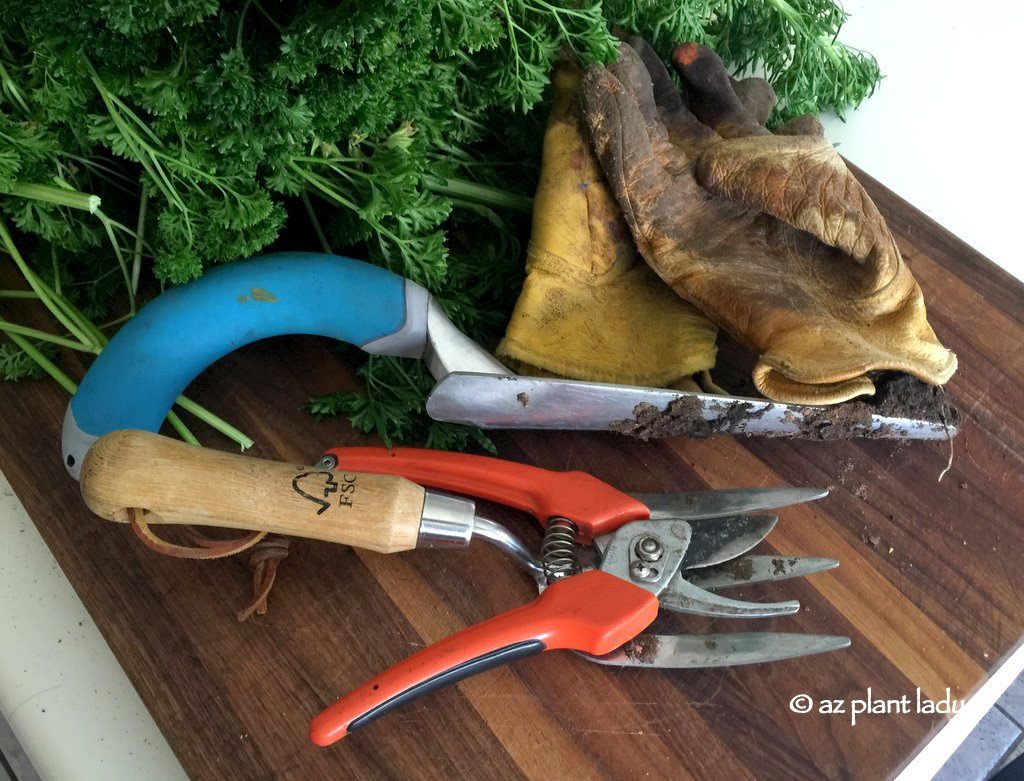
In fact, freshly harvested vegetables leave dirt behind on counters, floors too!
And those shiny, clean garden tools and spotless gloves? They don’t exist in a real garden.
Now, here is another secret of vegetable gardening…
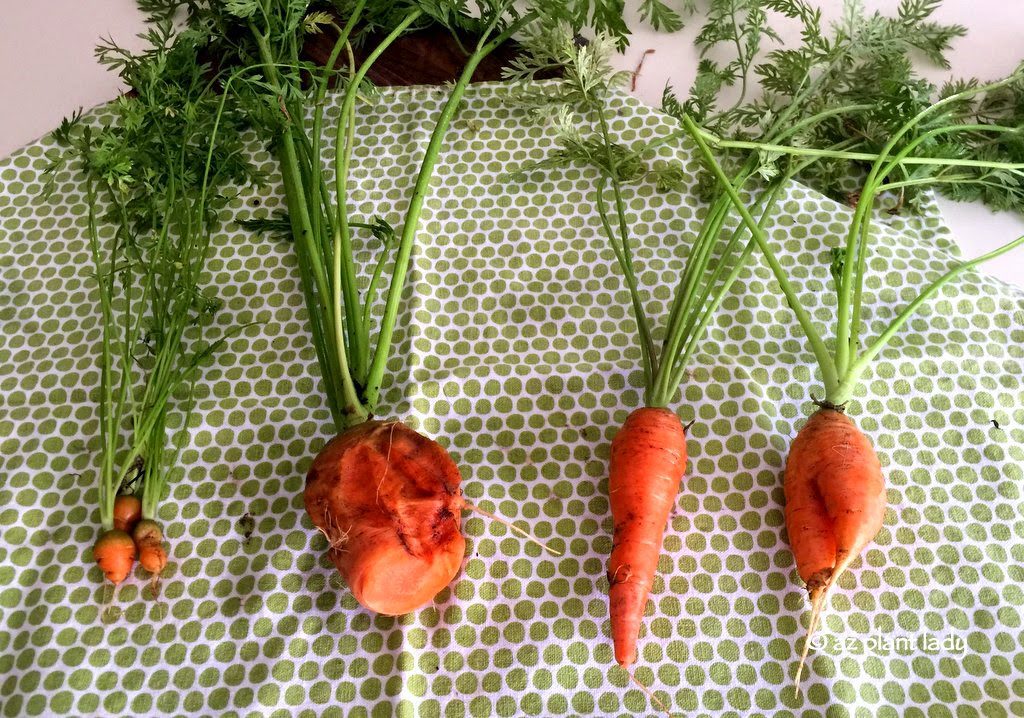
The Imperfect Shapes and Sizes are Normal
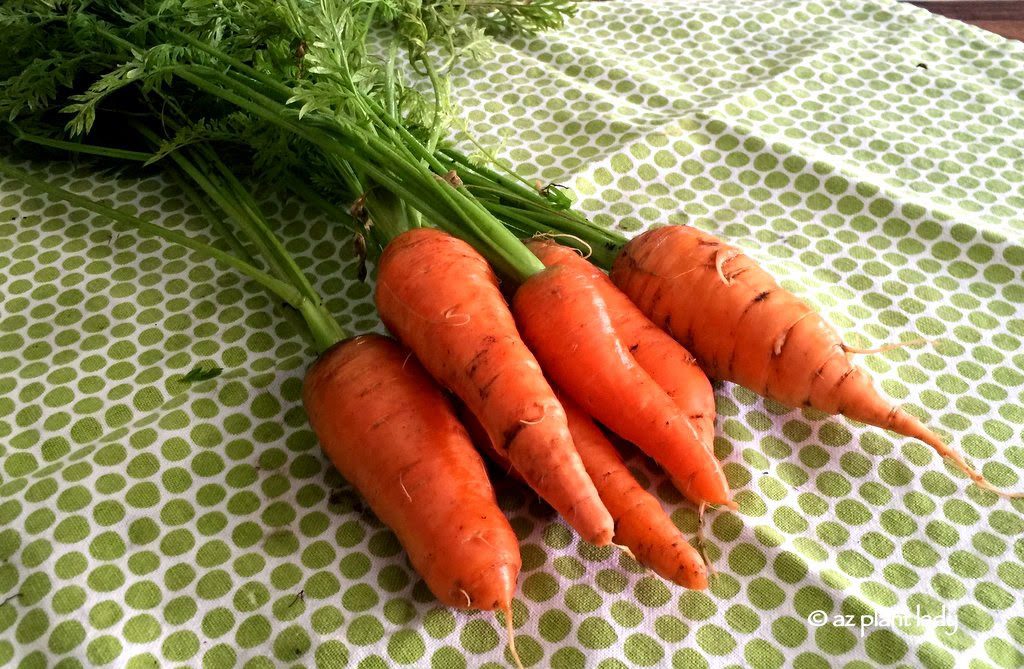
“Not all the vegetables are the same size and come out unblemished.”
Here are four carrots that I harvested from the same garden. As you can see, they are all different sizes.
The tiny ones, came from an area where I accidentally dropped a small pile of seeds. The large one was a result of an area in the garden that received too much water and the carrot was so big that it broke off as I attempted to pull it out.
Of course, any decent photo would display only the ‘normal-sized’ carrots – but that is not necessarily the truth of what a real garden harvest would look like.
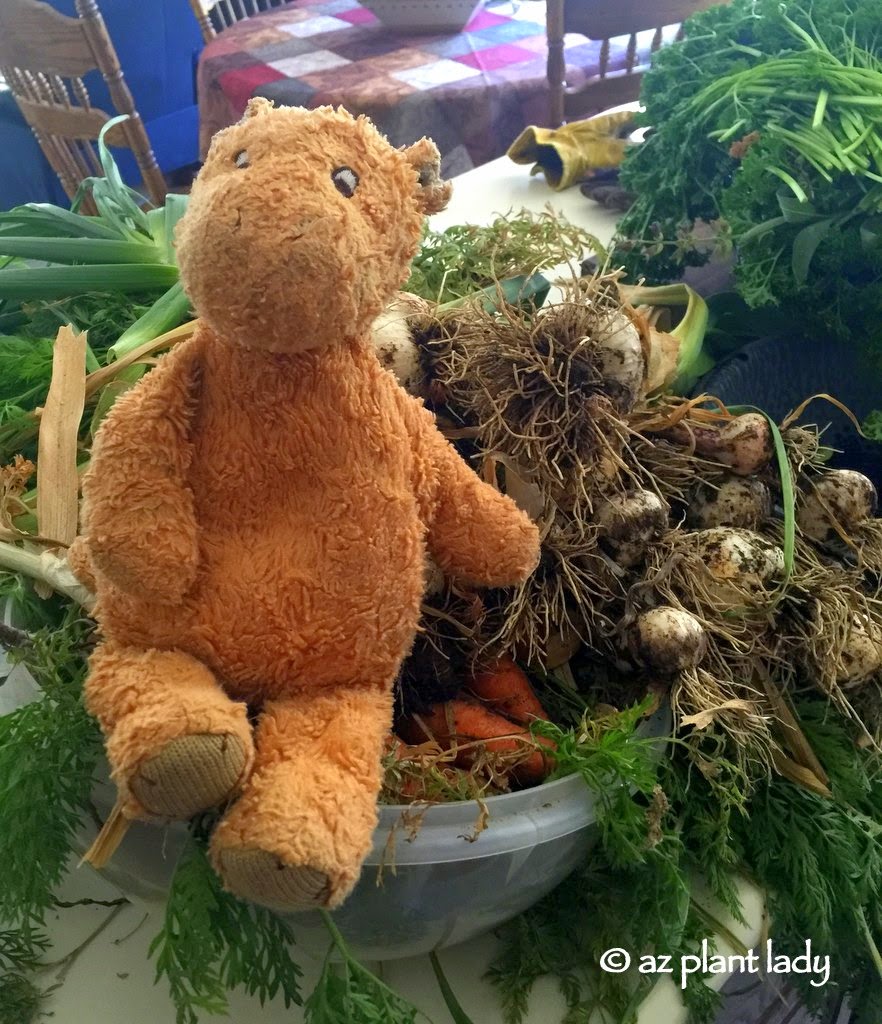
Lily’s Tigger was excited to try some carrots.
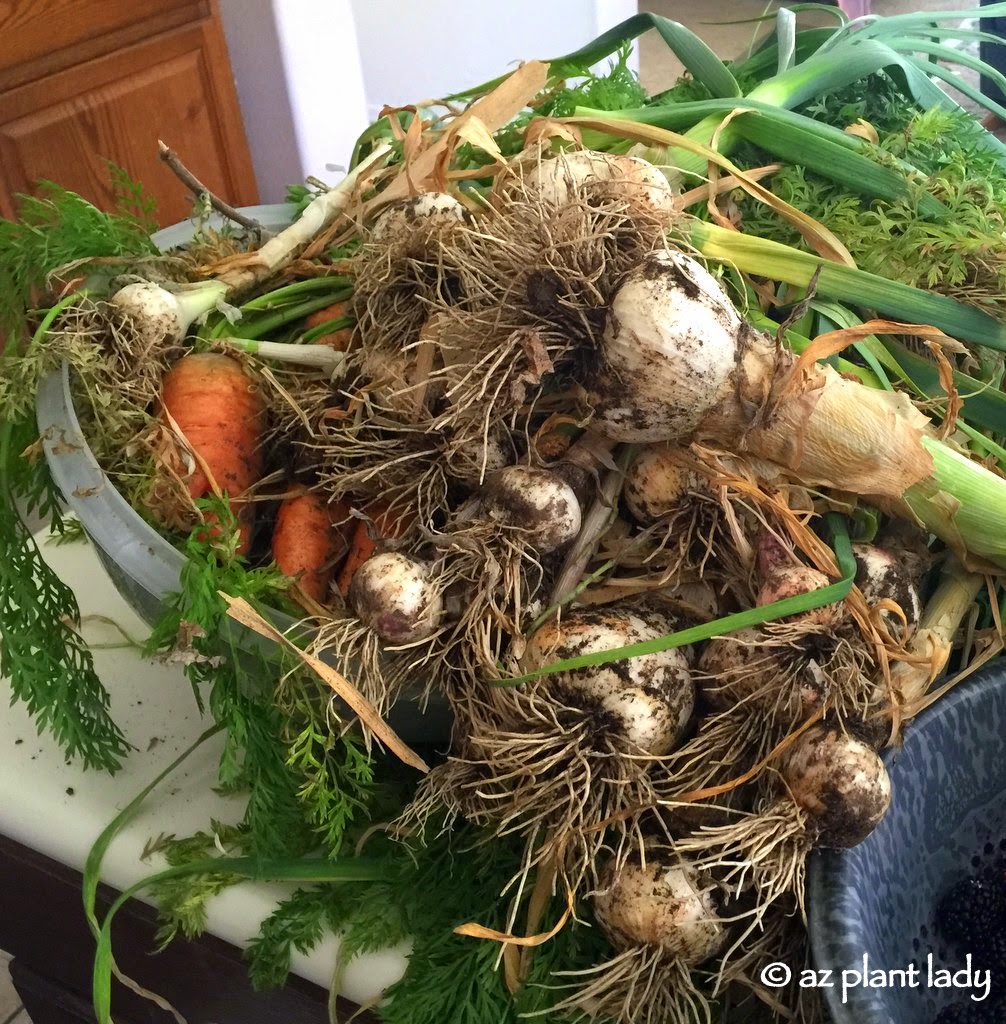
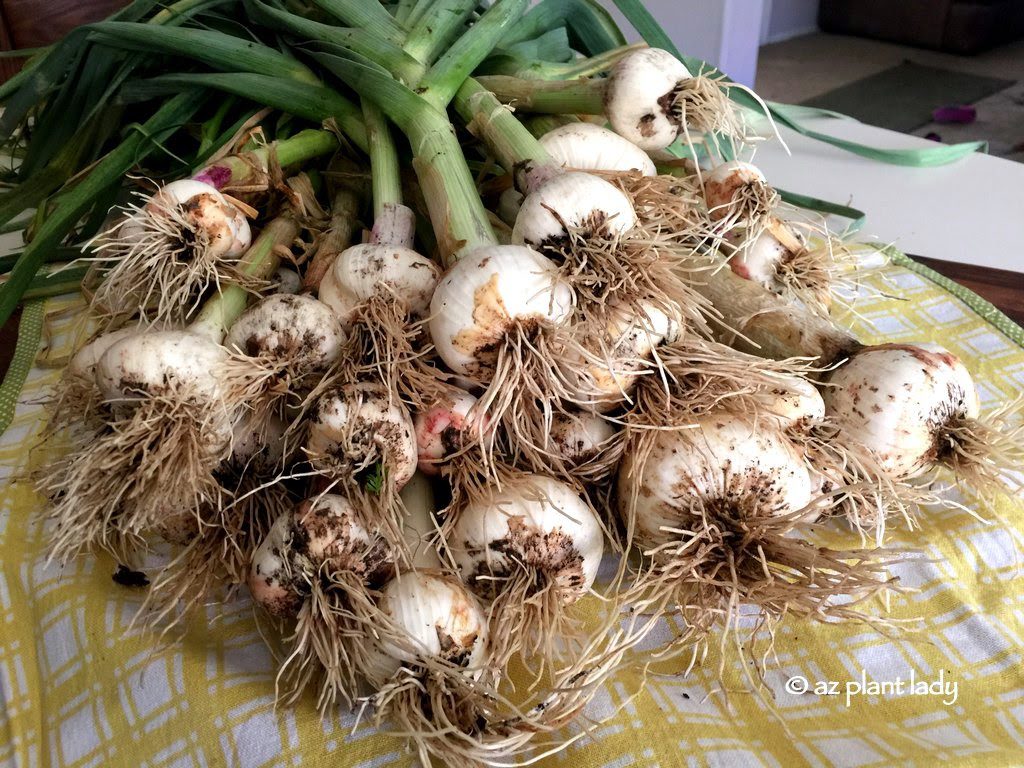
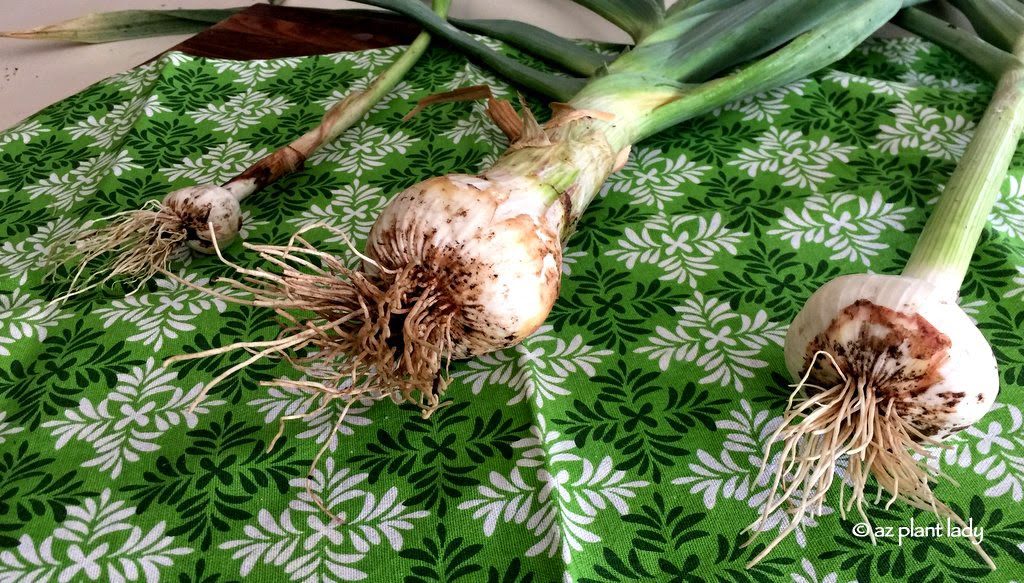
Garlic of All Sizes
Here is another example. Our crop of garlic was bountiful. But, notice that there are not all uniform sizes.
While the majority of the garlic harvest is made up of normal-sized garlic heads – there are some very small and some giant heads.
The Illusion of Garden Perfection
But of course, that is not what you see when people typically show off their garden harvest – especially when they are to be photographed.
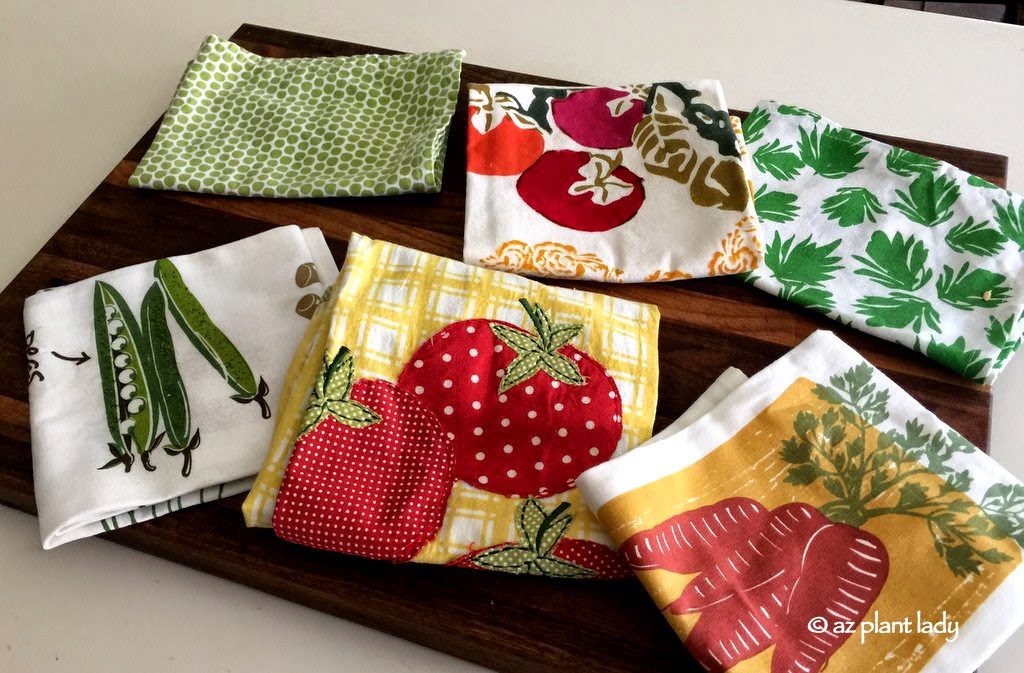
First, only the most attractive vegetables are shown – ones with no blemishes and uniform size. Second, all the dirt is removed. And finally, the decorative dish towels come out for an attractive background.
I have several decorative dish towels that have never seen a dish and I use them when I photograph vegetables, herbs, etc.
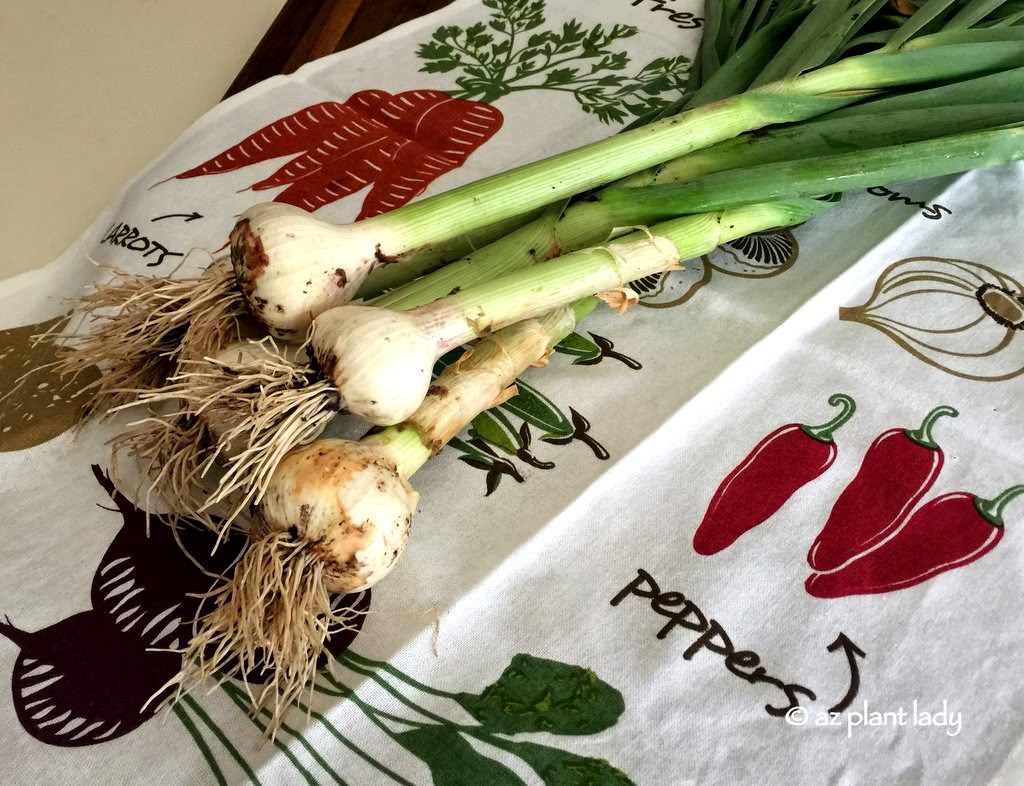
Here is my ‘perfect’ garlic harvest. What is interesting is what you DON’T see. All of them are nicely shaped, roughly the same size, and most of the dirt is gone. This is NOT what they look like when they come in from the garden.
The Best Advice is to Embrace Imperfection
So remember that vegetables aren’t perfectly clean, they may have blemishes and come in all sizes and shapes. So, when you harvest vegetables, don’t worry about perfect-looking vegetables. Remember, it’s the taste that matters!
https://www.azplantlady.com/wp-content/uploads/2022/05/dry_climate_garden.jpg8161232arizonaplantlady@gmail.comhttp://www.azplantlady.com/wp-content/uploads/2018/10/favicon.pngarizonaplantlady@gmail.com2022-05-01 12:19:212023-09-22 13:46:205 Ways to Save Water in the Dry Climate Garden
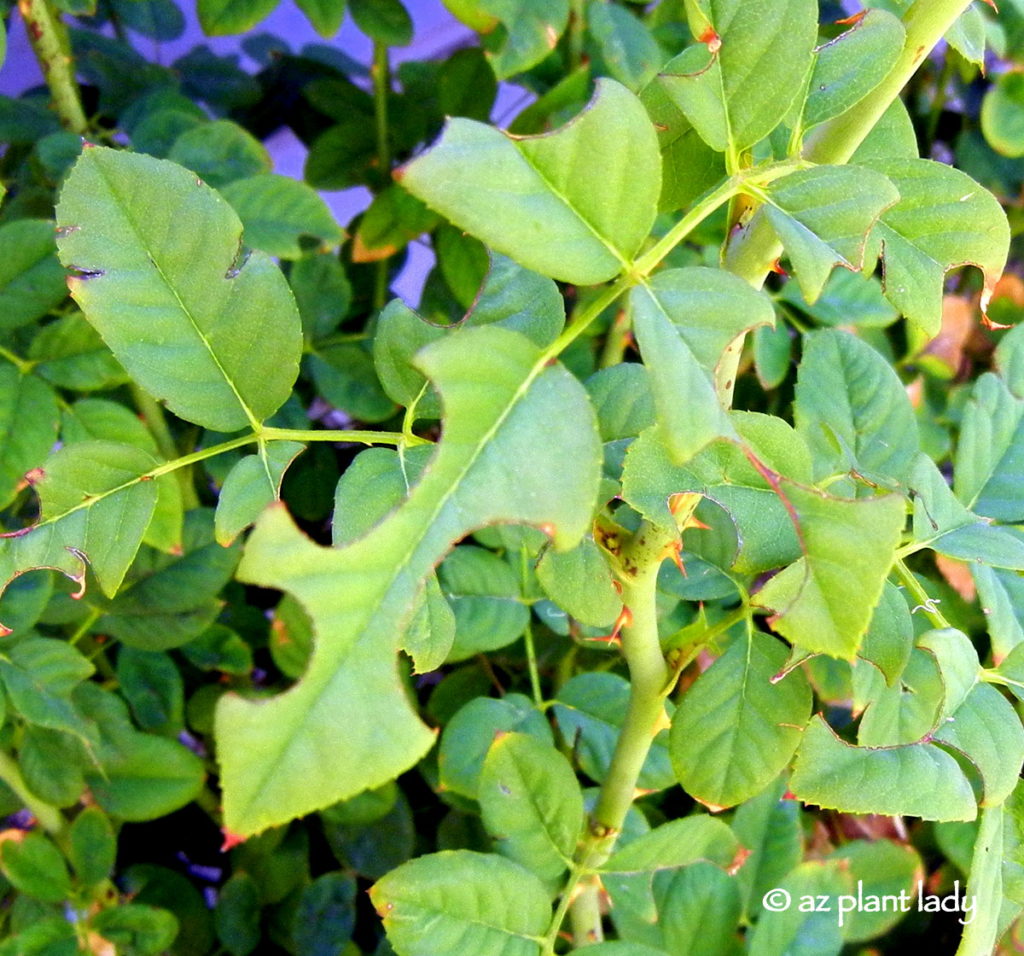
Have you ever noticed circular areas missing from your leaves? If so, you aren’t alone. The other day I noticed several of my plants with neat semi-circular sections missing. But, was I worried? Nope, and I’ll tell you why in my latest garden video.
The Enigmatic Damage to Leaves
A Puzzling Leaf Discovery
Noelle: Hey there, fellow garden enthusiasts! Today, we’re diving into a bit of a mystery. As I was strolling through my garden, I couldn’t help but notice something quite peculiar – several of my plant leaves had neat, semi-circular sections missing. Now, I know this might raise some alarms for many gardeners, but fear not, for I’m here to share some insights and reassure you that it’s not as ominous as it might seem.
Noelle: First things first, let’s take a closer look at these mysterious leaf patterns. You can see here on this rosebush, there’s a semi-circular chunk missing from one of the leaves. And over here on this hibiscus, another one. So, what’s going on? Is it some nefarious garden pest?
The Twist in the Tale of Leaves
Noelle: Well, here’s the twist – it’s not a pest at all! In fact, this leaf damage is quite natural and not something to fret over.
You see, the culprits behind these neat, semi-circular holes are none other than the remarkable leafcutter bees. Leafcutter bees are a type of solitary bee, and they are truly fantastic pollinators. What might appear as leaf vandalism is, in fact, a vital part of their unique nesting process.
Leafcutter bees utilize these semi-circular leaf sections to construct their nests. If you take a closer look, you might even spot some of these leaf sections tucked away in the nooks and crannies of your garden.
The Precision of Leafcutter Bees
Meticulous Craftsmen
Noelle: Leafcutter bees are known for their precision. They cut these perfect curves from the edges of leaves, and they’re surprisingly meticulous about it. The remarkable thing is that these bees aren’t interested in damaging your plants; they’re simply striving to build a safe and cozy space for their offspring.
Beneficial Garden Partners
Noelle: Now, here’s the best part – these bees are great for your garden! As they visit your plants to collect nectar and pollen, they’re inadvertently pollinating your flowers. This pollination process is an essential aspect of maintaining a healthy garden ecosystem.
Embrace the Leaf Patterns
A New Perspective
Noelle: So, the next time you come across these mysterious leaf patterns, don’t panic. Instead, take a moment to appreciate the hard work of these industrious leafcutter bees and the positive impact they have on your garden.
Thanks for joining me on this little garden mystery journey. If you enjoyed learning about leafcutter bees and want to see more fascinating garden insights, don’t forget to hit that subscribe button and give this video a thumbs up. Happy gardening!
In summary, the seemingly mysterious leaf damage caused by leafcutter bees is nothing to worry about. These industrious pollinators are beneficial to your garden, and their leaf-cutting activities are just part of their nesting process. So, next time you spot these neat, semi-circular holes in your leaves, remember to appreciate the role of leafcutter bees in your garden’s ecosystem. Happy gardening!
Has this happened in your garden? What plants were affected?
https://www.azplantlady.com/wp-content/uploads/2017/05/roses_leaf_cutter_bee_damage.jpg11201200arizonaplantlady@gmail.comhttp://www.azplantlady.com/wp-content/uploads/2018/10/favicon.pngarizonaplantlady@gmail.com2022-04-26 13:36:002023-09-22 14:35:09What’s Chewing On My Leaves?
A ‘Painted Lady’ butterfly drinking nectar from a lantana.
Learning from Mistakes in the Garden: A Green Thumb’s Journey
Embracing the Reality of Gardening
Do you know someone who has a green thumb? Usually, it’s someone with a beautiful garden that stands out among their neighbors with thriving plants that flourish.
While you may think people with green thumbs are born and not made, I’ll let you in on a BIG secret – behind every green thumb is a trail of many dead plants.
Behind the Scenes of a Green Thumb
It’s true. There isn’t a single experienced gardener who has never had a plant die in their garden. Of course, someone with a green thumb may be hesitant to reveal this fact, and you may not notice because dead or failing plants are usually pulled out before people notice.
I’m not exempt from this either – I’ve had many plants die on my watch.
Factors That Affect Plant Health and Your Green Thumb
Believe it or not, the fact that plants die in your garden helps you to become better at growing them. While your first inclination may be to get frustrated about the loss of a plant, look at it as a gardening lesson instead.
“Every dead plant is an opportunity to learn about what went wrong and how to avoid it in the future and become a better gardener in the process.”
There are several factors that can affect whether or not a plant does well. These include the following:
1. Climate Adaptation
Is it well-adapted to your climate?
2. Proper Exposure
Was it planted in the right exposure (sun, filtered sun, or shade)?
Was it maintained correctly (pruning, fertilizing)?
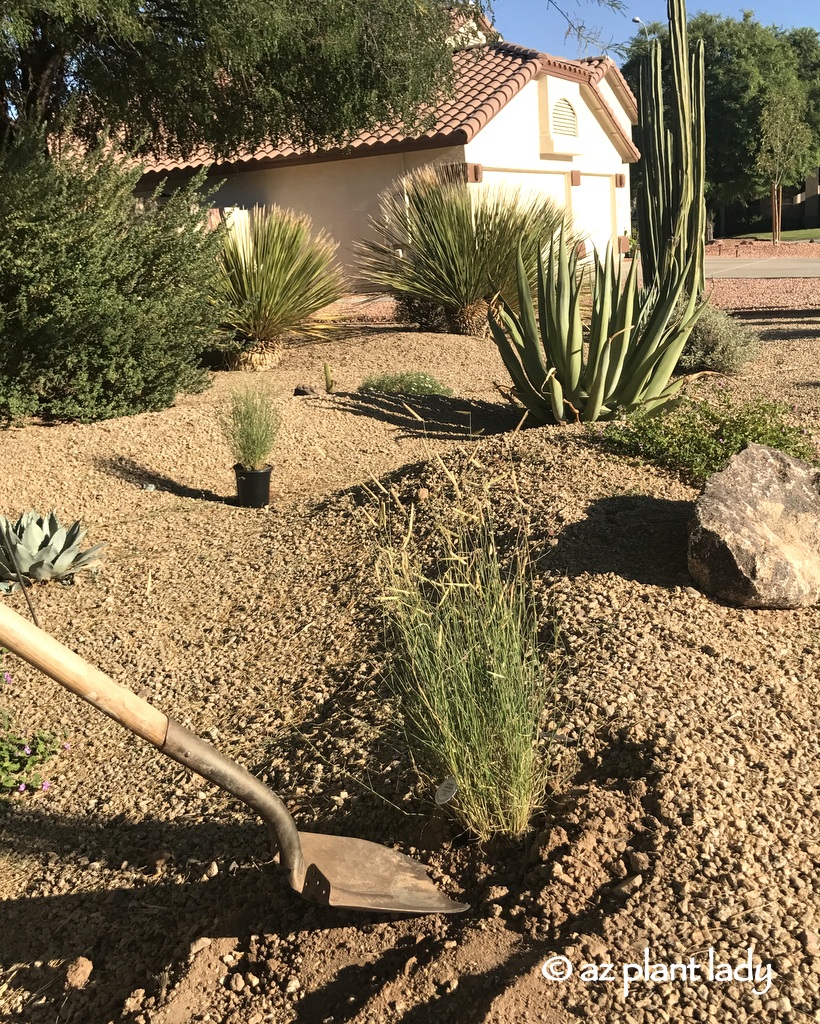
New ‘Blonde Ambition’ (Bouteloua gracilis)
Green Thumb Research and Experimentation
Researching plants before purchasing them will help you to avoid potential problems. But often the best way to learn how a plant will do is to grow them yourself.
Of course, it’s never a good idea to put a shade-loving plant in full sun, or vice versa as you’ll probably be replacing it soon.
As a horticulturist, I experiment in my garden with newer plants that have come onto the market. Several years ago, I planted several ‘Blonde Ambition’(Bouteloua gracilis) grasses. I had heard a few different tips about how to grow them and the best exposure – one says that filtered sun is a must while another person says it can handle full sun. So, I am trying them out in my front yard to see for myself where they will receive filtered shade until the afternoon when they will be blasted by the sun. UPDATE – they do best in full sun 🙂
*One fun bonus of being a horticulturist is that growers often send plants for free so I can try them and give them feedback about how they grow in a low-desert garden.
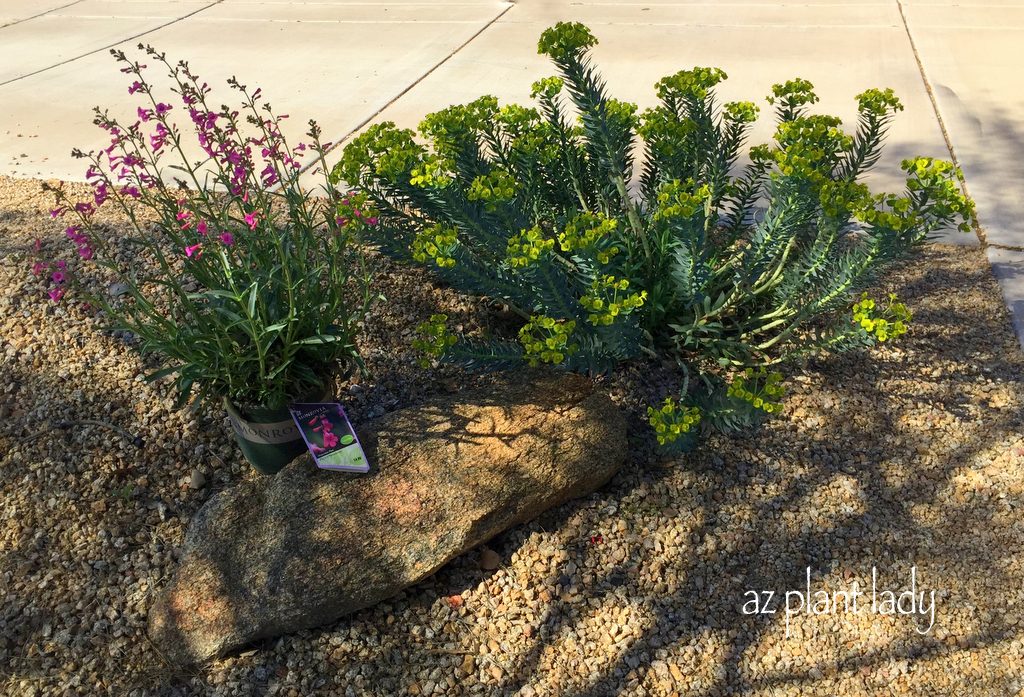
The Role of Nearby Trees
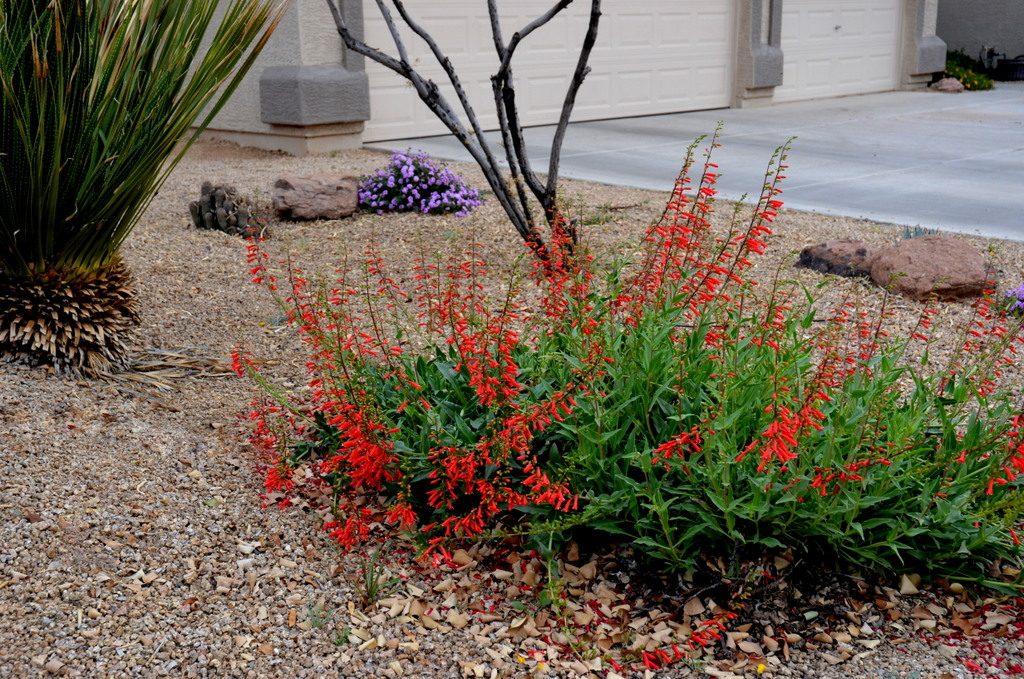
A new Parry’s penstemon (Penstemon parryi) finds a home next to my gopher plant (Euphorbia biglandulosa).
Other things that can affect how new plants will do are nearby plants – specifically trees.
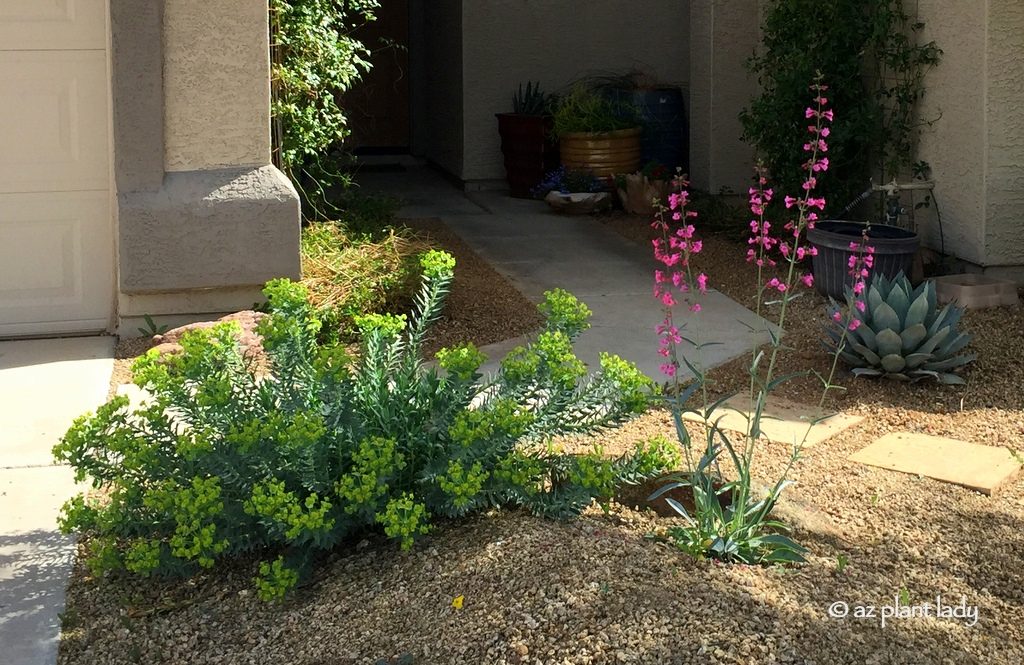
One month later.
A tree that creates dense shade will make it difficult for many flowering plants to do anything but grow foliage at the expense of flowers. However, filtered shade from desert natives such as mesquite and palo verde create an ideal environment for many blooming plants that enjoy a little respite from the full sun.
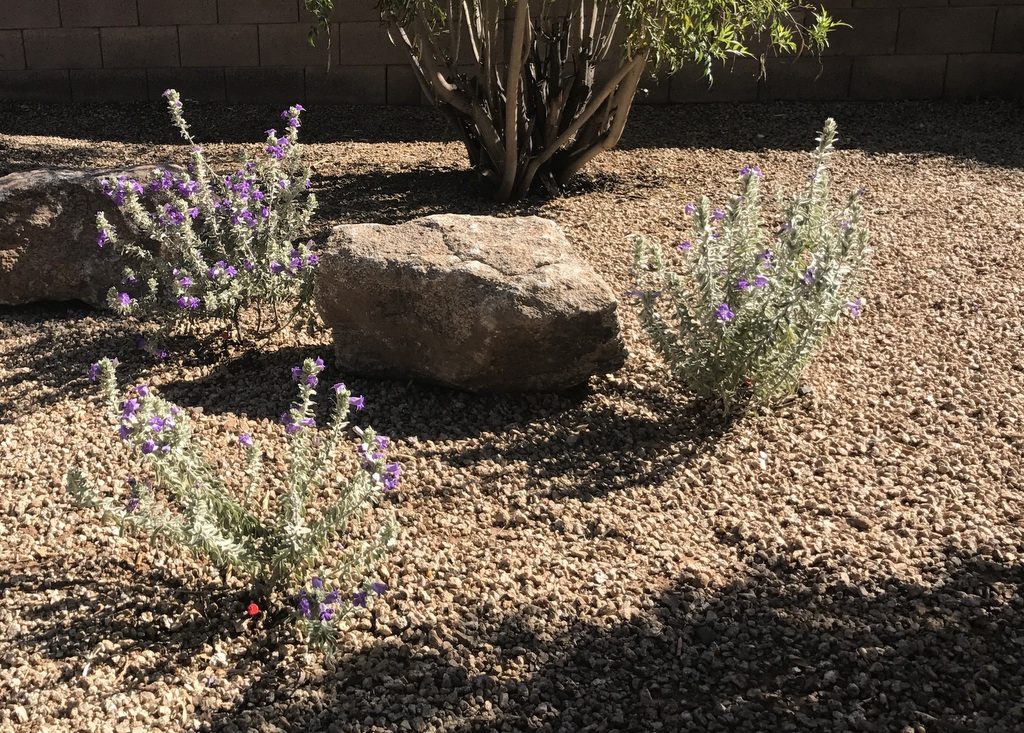
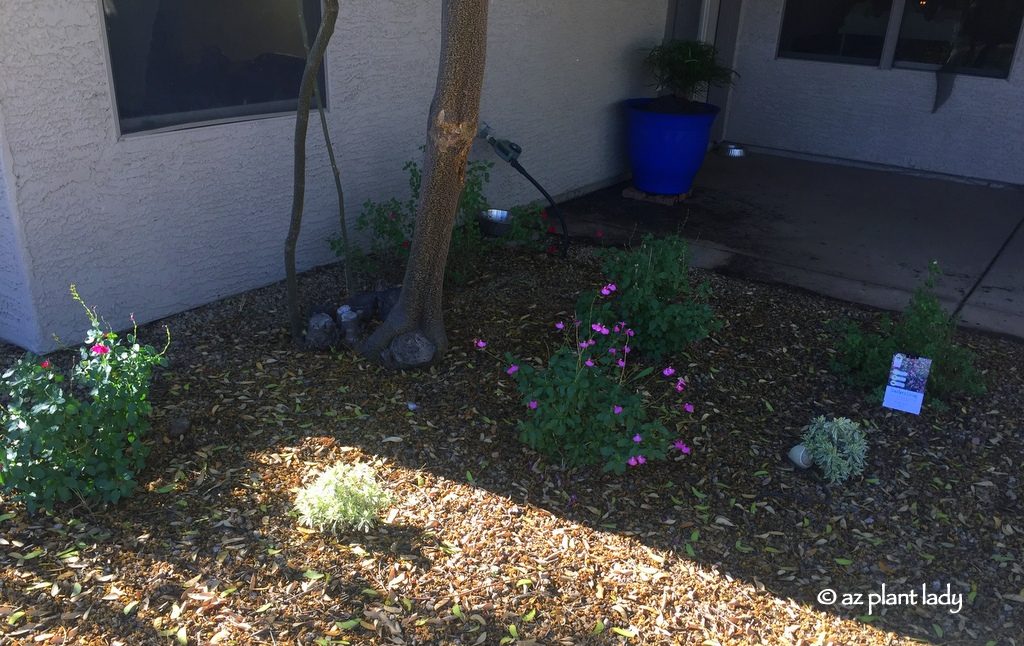
New varieties of autumn sage with the brand new lavender ‘Meerlo’.
Unpredictable Nature of Gardening
Sometimes, there isn’t much information available on new plant introductions and how they will do in an area with extreme weather such as our hot, dry one. In this area, a grower sent me plants to see how they would fare in a low desert garden. From past experience, I knew that salvia would need some shade, but the lavender was a mystery. I’ve seen some other species of lavender doing well in full sun while others doing well in filtered shade.
As you can see, the ‘Meerlo’ lavender did very well in my zone 9 garden even though the actual information on the plant tag states that it does best in zone 8 and below.
Green Thumb Lessons
This is a lesson that I could have only learned by trying out this plant in my garden. While it could have died, it didn’t and I’ve learned from the experience, which adds to my overall garden knowledge.
So, the next time you find a dead plant in your garden, see if you can figure out why it died and learn from it. Sometimes plants die when they should be thriving for no apparent reason. Nature isn’t always predictable and sometimes you may have no answers, but you’ll be surprised at what you can learn, and before you know it, your thumb may slowly turn ‘green’.
https://www.azplantlady.com/wp-content/uploads/2017/10/firecracker_penstemon_eatonii_purple_trailing_lantana.jpg6791024arizonaplantlady@gmail.comhttp://www.azplantlady.com/wp-content/uploads/2018/10/favicon.pngarizonaplantlady@gmail.com2022-01-04 19:10:002023-09-22 16:11:15Behind Every Green Thumb Are a Trail of Dead Plants
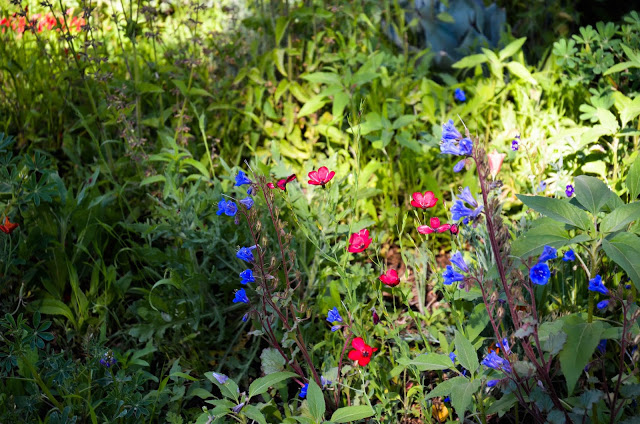
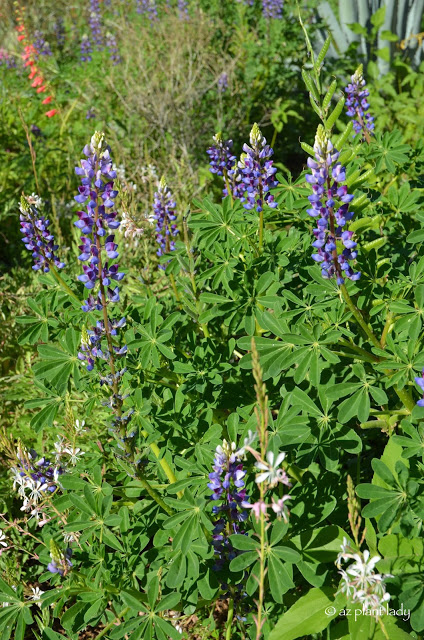
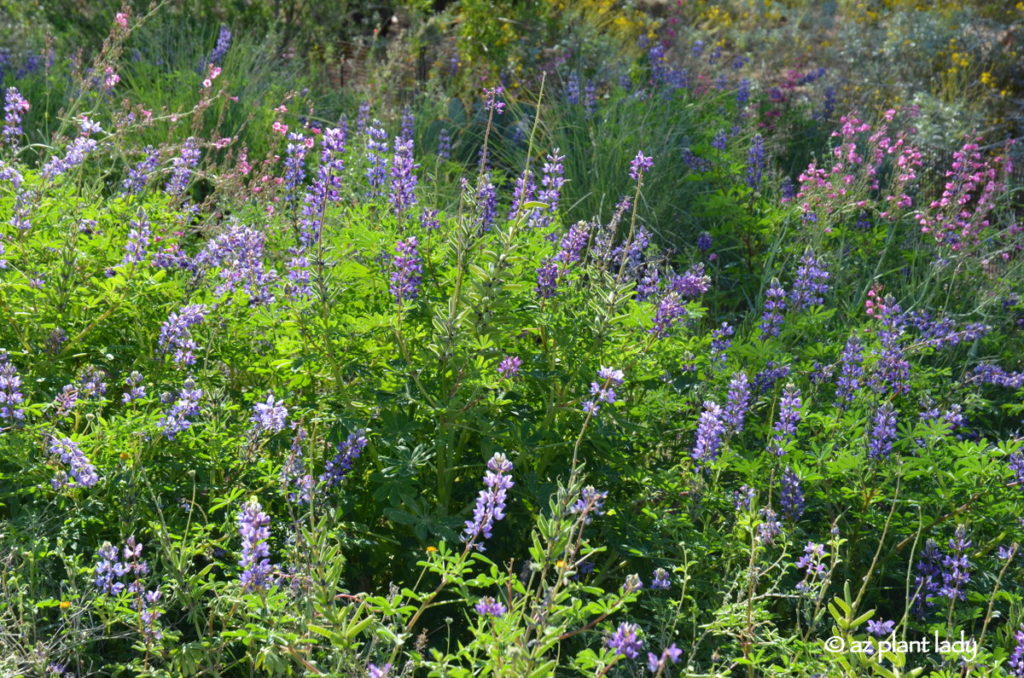
One of spring’s many joys are the fields of wildflowers that we often see growing along the side of the road. It is one of the many miracles of nature how such lovely flowers can grow in the wild without any help from people.
I find it kind of ironic that if we want to grow these flowers of the wild in our own garden we have to give them a little assistance to get them going. But, the preparation is fairly simple and the rewards are definitely well worth the effort.
Arroyo lupine with white gaura
Planting for a Spring Show
To achieve a breathtaking spring wildflower display, it’s crucial to plan ahead. When it comes to wildflowers, autumn emerges as the ideal time for sowing seeds that will later burst into vibrant spring blooms. This strategic timing allows the seeds to establish strong root systems during the cooler months, ensuring they’re well-prepared to flourish when spring’s gentle warmth and longer days arrive.
So, as summer transitions into fall, seize the opportunity to sow the seeds of nature’s beauty in your garden, and you’ll be rewarded with a picturesque wildflower spectacle come springtime.
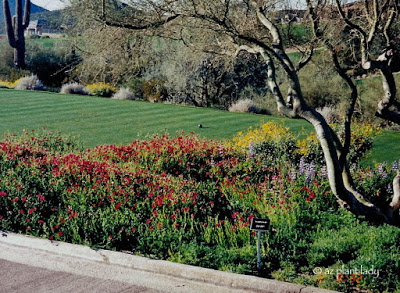
Lessons from a First Wildflower Garden
I’ve planted wildflower gardens throughout my career, but I’ll never forget my first one. It was on a golf course and I sowed quite a bit of wildflower seed in that small area – and I mean a LOT of seed. The wildflowers were growing so thickly together and probably would have looked nicer if I had used less seed and/or thinned them out a little once they started to grow. But, I loved that little wildflower garden.
Embrace Wildflowers in Your Garden
If you have a fondness for wildflowers and the enchanting beauty they bring, consider carving out a dedicated space within your garden to cultivate your own captivating wildflower haven. By allocating a portion of your garden to these lovely, untamed blooms, you not only embrace the allure of the wild but also foster a unique and vibrant ecosystem right in your backyard.
With some thoughtful planning and care, you can create a harmonious blend of native or adapted wildflowers that not only adds natural charm but also supports local pollinators and wildlife. So, why not embark on the journey of nurturing your personal wildflower oasis and experience the wonders of nature’s artistry up close?
**Do you have a favorite wildflower?
https://www.azplantlady.com/wp-content/uploads/2016/10/Southwest_Wildflowers_red_flax_California_bluebells.jpg424640arizonaplantlady@gmail.comhttp://www.azplantlady.com/wp-content/uploads/2018/10/favicon.pngarizonaplantlady@gmail.com2021-09-29 19:30:002023-09-22 16:09:02Sow Wildflower Seed in Fall for a Gorgeous Spring Display
As summer begins to slowly fade and the heat begins to dissipate, the Southwestern garden comes alive with second spring.
In the absence of scorching 100+ degree temperatures, both plants and people reawaken to the vibrant beauty of the desert landscape during the fall season.
The Allure of Autumn is “Second Spring”
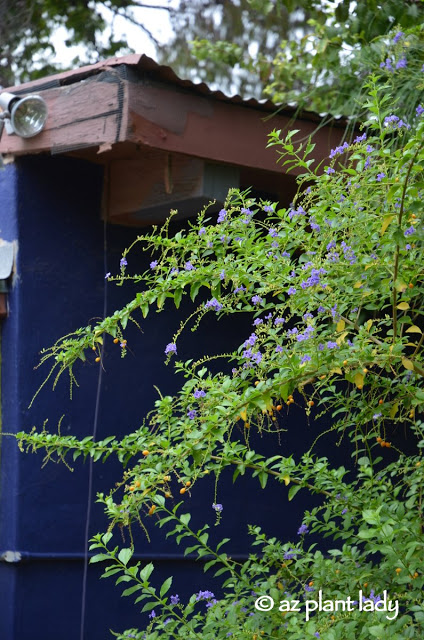
When people talk about their favorite season, many will tell you that spring is the time that they enjoy the most as their gardens come alive, spring forth with new green growth and colorful blooms. But in the desert Southwest, there’s another season that deserves just as much acclaim – fall, often referred to as the “second spring.”
Sky Flower (Duranta erecta)
While spring is a glorious time in the desert landscape with winter blooms overlapping with spring flowering plants along with cactus flowers – it isn’t the only ‘spring’ that the desert experiences.
A Season of Renewal
Fall in the desert brings a rejuvenating touch. The cooler temperatures breathe new life into plants, coaxing them into refreshed appearances and prolonging their flowering displays. Irrigation becomes less of a chore. Birds, butterflies, and various wildlife also make a prominent return during the daytime hours.
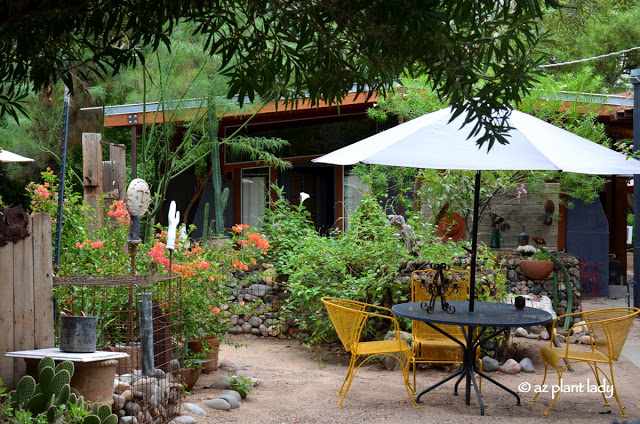
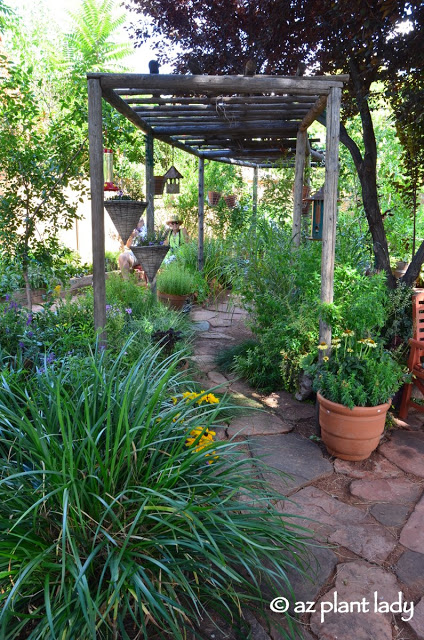
The Great Outdoors Beckons
With the arrival of fall, desert residents find themselves irresistibly drawn outdoors. Whether it’s leisurely walks, al fresco dining, or simply working outdoors, the comfortable temperatures and captivating landscapes make every moment spent outside a delight.
Fall is the ideal season for making alterations to your garden. It’s the perfect time to replace thirsty, old plants with drought-tolerant alternatives or expand your outdoor living space by adding new features like patios or pergolas.
Flame Acanthus (Anisacanthus quadrifidus v. wrightii)
Second Spring Planting for the Future
Regardless of your garden’s location, fall stands as the prime season for introducing new plants to your landscape. With three growing seasons ahead, it offers them the opportunity to establish robust root systems before the next scorching summer arrives.
No matter what garden region you live in – second spring is the best time of year to add new plants to the landscape as it provides plants with three seasons in which to grow a good root system before the heat of the next summer arrives.
**Thinking of making some changes to your landscape? Click herefor a list my favorite drought tolerant plants that provide fall blooms.
https://www.azplantlady.com/wp-content/uploads/2015/09/Artist_Garden_Phoenix_Southwest_264Sep92C20152C9-36AM.jpg424640arizonaplantlady@gmail.comhttp://www.azplantlady.com/wp-content/uploads/2018/10/favicon.pngarizonaplantlady@gmail.com2021-09-07 16:45:002023-09-22 16:24:38Celebrating “Second Spring” in the Southwest Garden
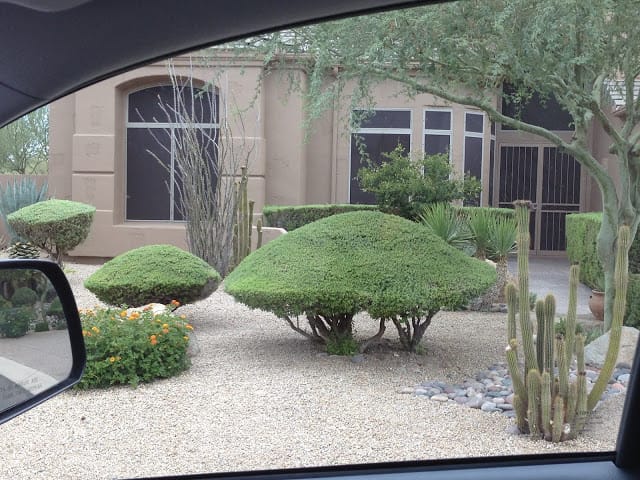
A few weeks ago, I had the opportunity to take another photo of a landscape I passed by in a neighborhood where I had just finished up a landscape consultation. I was shocked at the mushroom shaped shrubs.
The Pitfalls of Shrub Pruning Mistakes
Sadly, I often see examples of truly ‘interesting’ or should I say ‘bad’ pruning. I drove by this landscape and then made a U-turn so that I could take a quick photo…
Shrub pruning
I don’t know about you, but these Texas sage shrubs look like mushrooms, don’t you think?
Sadly, pruning these beautiful flowering shrubs this way robs them of their flowers, increases maintenance, creates dead wood, and shortens their life.
Misguided Pruning in Strange Shapes
While there are quite a few shrubs that take well to repeated formal pruning – doing this to flowering shrubs should be avoided.
I must admit that I have seen Texas sage and other flowering shrubs pruned into many different shapes…
But, let me be frank – shrubs aren’t meant to be cupcakes, frisbees, or gumdrops
Why You Should Avoid Improper Shrub Pruning
Here are just a few reasons why…
1. Energy Deprivation
It removes the leaves needed for the shrub to make energy for itself
2. Increased Growth and Maintenance
Excessive pruning actually makes your shrubs grow faster, which equals MORE maintenance
3. Water Demands
Shrubs pruned often require more water as they constantly work to replace foliage lost
4. Shortened Lifespan
Continued shearing will shorten the lifespan of your shrubs
5. Aesthetic Impact
Green ‘blobs’ are ugly compared to beautiful flowering shrubs
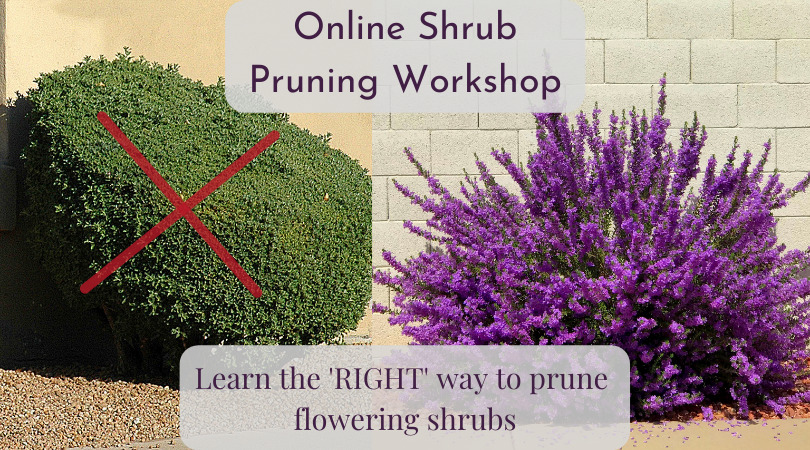
Join Our Online Shrub Pruning Workshop
If you are tired of the time and money it takes to maintain flowering shrubs the ‘wrong’ way. I invite you to join me in my online shrub pruning workshopwhere I will teach you the right way to prune.
Imagine your outdoor space filled with beautiful, flowering shrubs instead of green ‘balls’. Believe it or not, the shrubs in the photo above are the SAME plant – they have just been maintained differently. The one on the left takes much more money and time and the other thrives with pruning once (or twice) a year.
In my online class, I show you how to work with your landscaper or how you can take care of your shrubs yourself. Got ‘green balls’ already in your landscape? I’ll teach you how to rejuvenate them and the best time of year to do it.
So, ditch the ‘green blobs’ in your yard and learn how to prune with confidence – it’s much easier than you think. Learn morehere and what students have to say about the class.
https://www.azplantlady.com/wp-content/uploads/2013/07/IMG_1844.jpg480640arizonaplantlady@gmail.comhttp://www.azplantlady.com/wp-content/uploads/2018/10/favicon.pngarizonaplantlady@gmail.com2021-07-20 19:15:002023-09-25 15:02:37The Importance of Proper Shrub Pruning
We use cookies on our website to give you the most relevant experience by remembering your preferences and repeat visits. By clicking “Accept All”, you consent to the use of ALL the cookies. However, you may visit "Cookie Settings" to provide a controlled consent.
This website uses cookies to improve your experience while you navigate through the website. Out of these, the cookies that are categorized as necessary are stored on your browser as they are essential for the working of basic functionalities of the website. We also use third-party cookies that help us analyze and understand how you use this website. These cookies will be stored in your browser only with your consent. You also have the option to opt-out of these cookies. But opting out of some of these cookies may affect your browsing experience.
Necessary cookies are absolutely essential for the website to function properly. These cookies ensure basic functionalities and security features of the website, anonymously.
Cookie
Duration
Description
cookielawinfo-checkbox-analytics
11 months
This cookie is set by GDPR Cookie Consent plugin. The cookie is used to store the user consent for the cookies in the category "Analytics".
cookielawinfo-checkbox-functional
11 months
The cookie is set by GDPR cookie consent to record the user consent for the cookies in the category "Functional".
cookielawinfo-checkbox-necessary
11 months
This cookie is set by GDPR Cookie Consent plugin. The cookies is used to store the user consent for the cookies in the category "Necessary".
cookielawinfo-checkbox-others
11 months
This cookie is set by GDPR Cookie Consent plugin. The cookie is used to store the user consent for the cookies in the category "Other.
cookielawinfo-checkbox-performance
11 months
This cookie is set by GDPR Cookie Consent plugin. The cookie is used to store the user consent for the cookies in the category "Performance".
viewed_cookie_policy
11 months
The cookie is set by the GDPR Cookie Consent plugin and is used to store whether or not user has consented to the use of cookies. It does not store any personal data.
Functional cookies help to perform certain functionalities like sharing the content of the website on social media platforms, collect feedbacks, and other third-party features.
Performance cookies are used to understand and analyze the key performance indexes of the website which helps in delivering a better user experience for the visitors.
Analytical cookies are used to understand how visitors interact with the website. These cookies help provide information on metrics the number of visitors, bounce rate, traffic source, etc.
Advertisement cookies are used to provide visitors with relevant ads and marketing campaigns. These cookies track visitors across websites and collect information to provide customized ads.