Some of you may be surprised to find that many trees are not planted correctly. As a Certified Arborist, I have seen countless trees that are suffering from problems that are caused by improper planting. The damage can actually take years to show up in some cases.
As a young horticulturist working for a 36-hole golf course, I had hundreds of trees that I was in charge of. At that time, there was we were planting quite a few more trees around the golf courses. During I was fortunate to work with a Consulting Arborist whose company we would hire annually to prune the very tall trees that my crew could not reach.
I learned so much from him and he inspired me to obtain my Certified Arborist certification.
Growing beautiful and healthy trees is not very difficult, especially if you start them out right. So over the next few posts, we will cover how to prepare the hole, how to plant trees, stake and water them.
Okay, so you have your tree all picked out and you are ready to plant. Before you dig your hole, you need to do one thing first if your tree is a box tree or in a container.
Gently scrape the top layer of soil until you reach the part of the tree trunk where it begins to flare out.
Many trees from nurseries and even those that have been boxed, often have an extra layer of soil. This layer can smother the roots if it is too thick. Roots need oxygen and if there is too much soil, that decreases the amount of oxygen that is available to them.
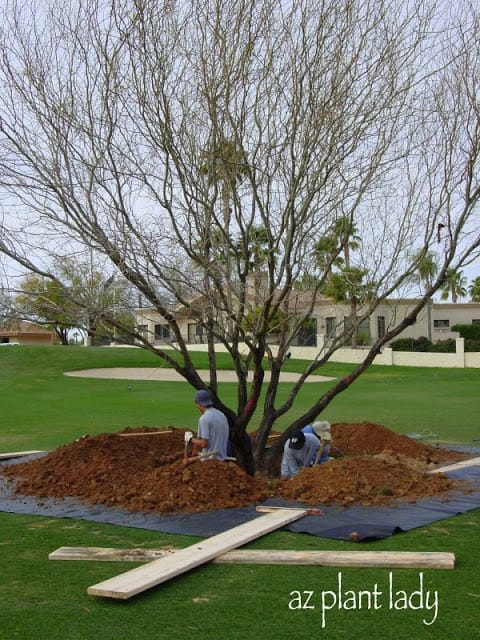
Okay, now we are ready to dig ‘the hole’.

Now if you are like me, I love it when someone else is digging the hole 😉
So at this point, may you are just quickly reading through this post, which is fine with me. BUT, if you will only remember a little bit of this post, this is the most important piece of information:
Make a hole at least 3X as wide as the root ball of the tree and just as deep as the root ball (once you have scraped off any excess soil from the top).
There, that wasn’t so bad was it?
You want the hole wider then the root ball so that the roots can grow easily outwards.
The hole should be no deeper then the root ball because the roots can be easily smothered.
Now if you live in an area with poor drainage, you will need to check the drainage in your hole. To do this, simply fill the hole with water and let it drain (this may take a while). Then fill it up again and if it does not drain out within 24 hours – you have a drainage problem.
You can either locate your tree in an area with better drainage, or create a ‘chimney’ through the bottom of the hole to break through the impermeable layer, known as caliche. This is back breaking work, but it will be worth it when your tree lives instead of dying.

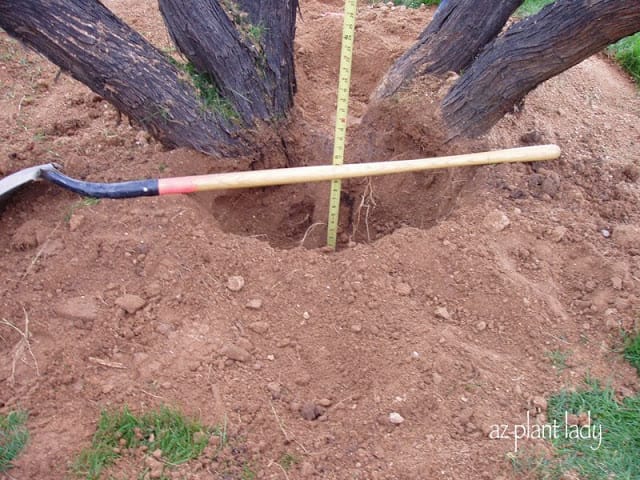
Look at the original soil level that this boxed tree had (where the shovel is) and where the trunk flare is at the bottom. The workers actually had to dig their newly planted tree up and add more soil to the bottom of the hole so that the soil level would be where the trunk flare started.
Okay, we are almost done with preparing our hole.
Now many of you would probably think that this would be a good time to add organic matter such as compost and maybe a handful of fertilizer.
Well the answer is actually NO…..
Numerous studies have shown that when people add organic matter to enrich the soil for ornamental trees that something interesting happens…..
Imagine that you are a tree root and you have just been planted in a mixture of really rich soil. So, you begin to grow outwards and then you reach an area where the soil is not rich…..in fact it is rather boring. Well, at this point you decide to just stay where the soil is rich and you do not grow outwards any further.
So, just use the existing soil when planting ornamental trees, which will result in the roots growing outwards for greater distances.
Okay, so now we have the perfect sized hole and our tree is ready.
Stay tuned for Part 2 on how to plant and stake your tree….
****************************
Please check out my latest Birds & Blooms post


